Sign In / Sign Up
 Orders
 Product Keys
 Downloads

How to Create Installation Media for Windows Server 2016
After downloading the installation file (Windows Server 2016 .iso), you need to create a bootable USB drive to perform the installation.
Note: A USB device with at least 16 GB of memory is required.
The tool you can use for this process is:
Rufus
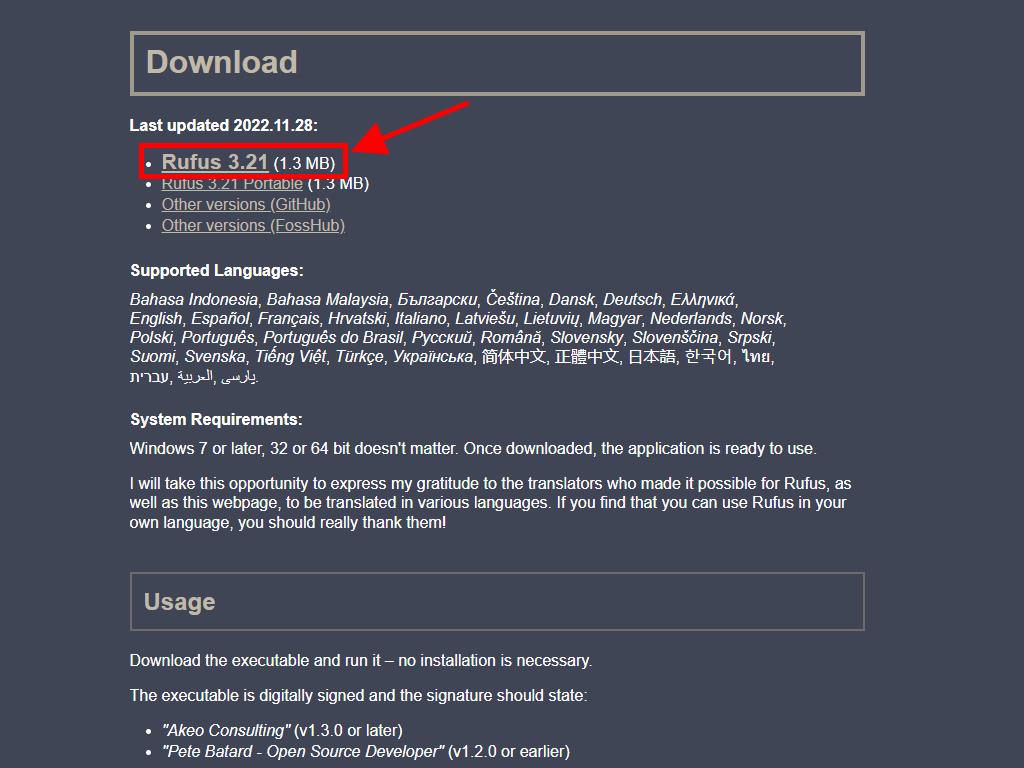
- Download Rufus for free here.
- Scroll down to the Download section and get the latest version of Rufus.
- Connect your USB drive and then launch the Rufus application.
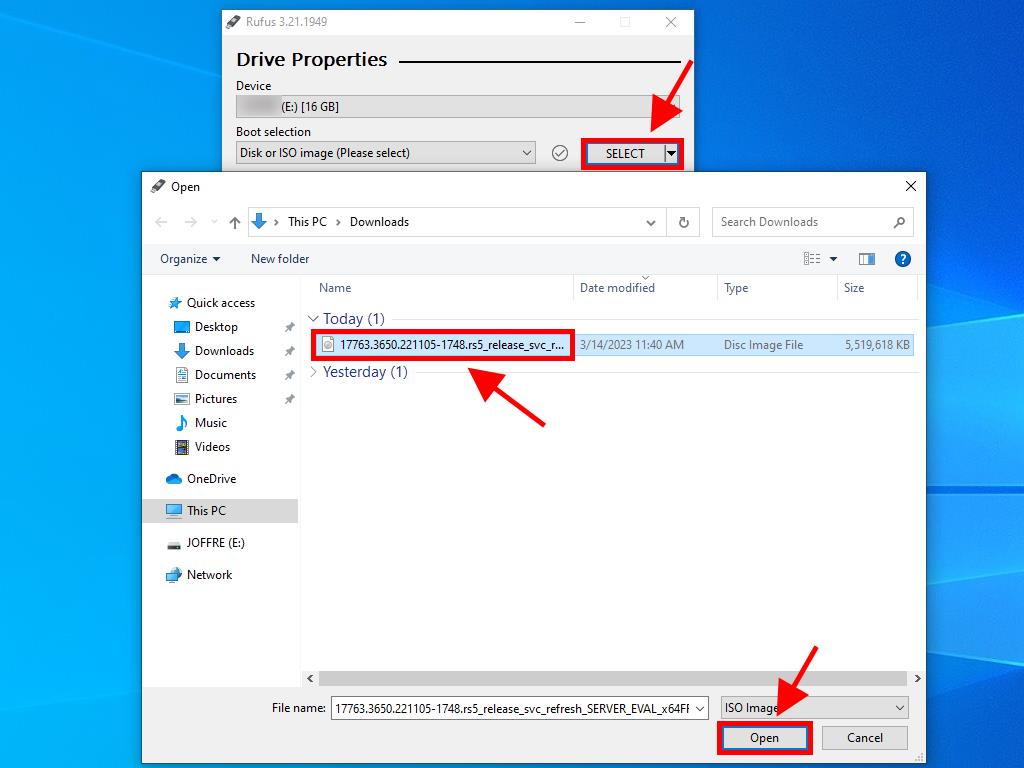
- Click on Select and navigate to the Windows Server 2016 .iso file you want to use.
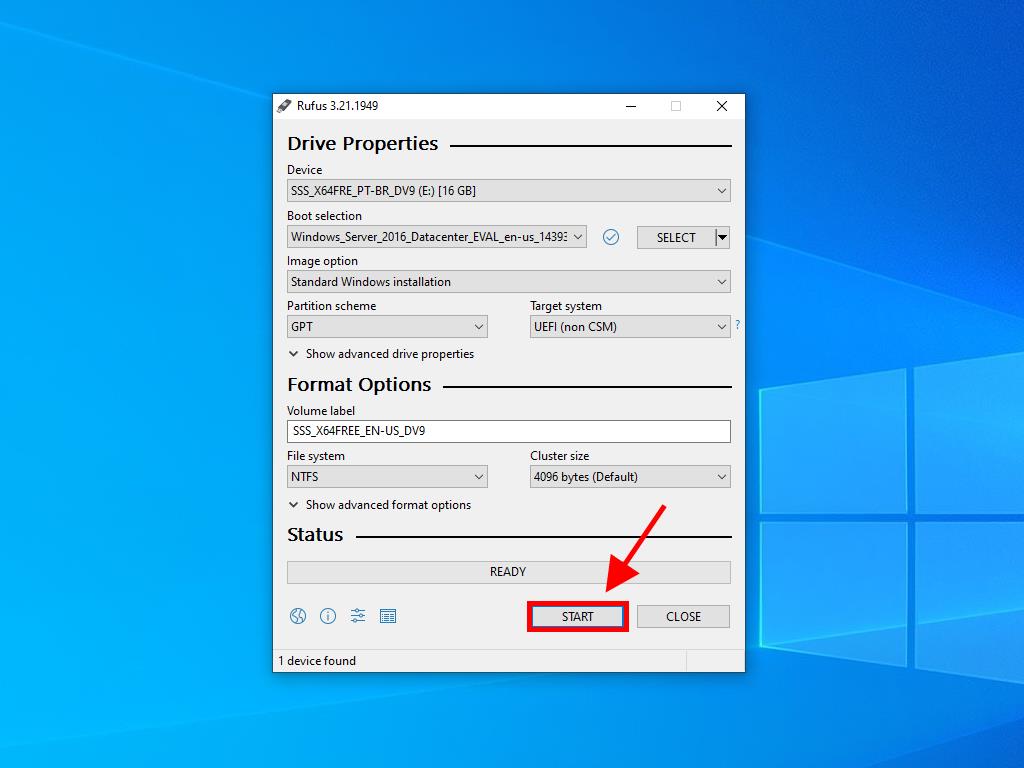
- Finally, click Start and wait for Rufus to create the bootable USB drive.
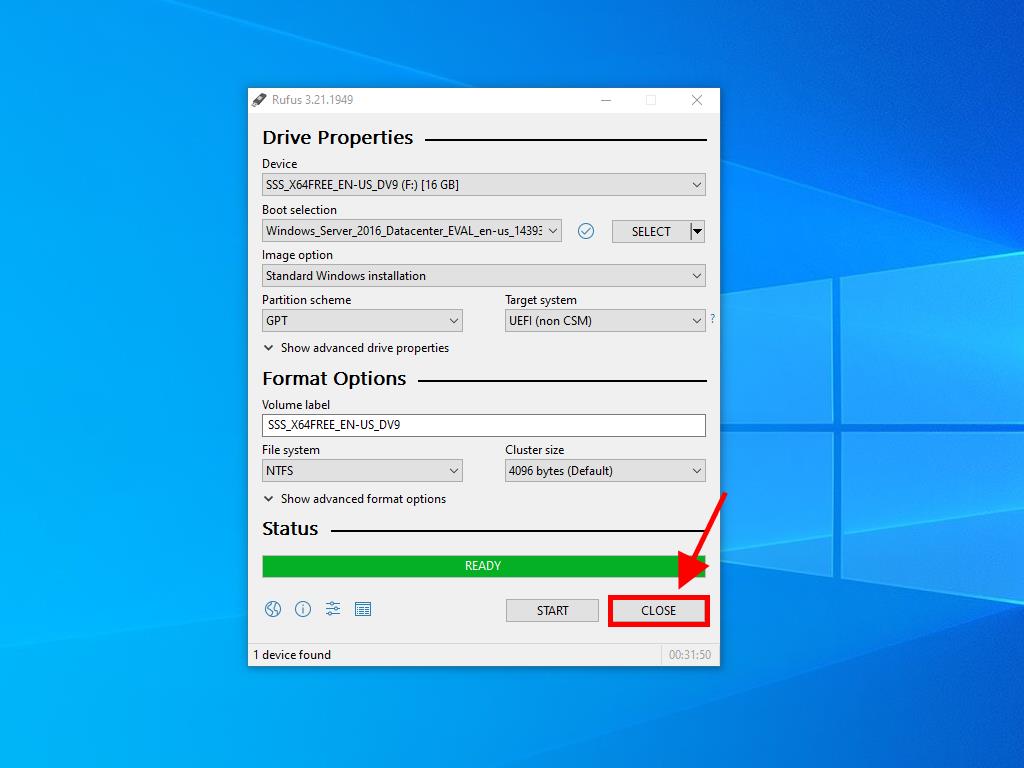
- Once the process is complete (progress bar shows Ready), click Close and you're ready to install Windows Server 2016.
Note: A popup window titled Customize Windows Installation will appear; choose the Disable Data Collection option and wait for Rufus to complete the process.