Sign In / Sign Up
 Orders
 Product Keys
 Downloads

Crafting a Bootable USB Drive for Windows Server 2019
Begin by obtaining the Windows Server 2019 .iso file and use it to prepare a bootable USB stick for the setup process.
Reminder: A USB stick with at least 16 GB of storage is necessary.
The tool recommended for this task is:
Rufus
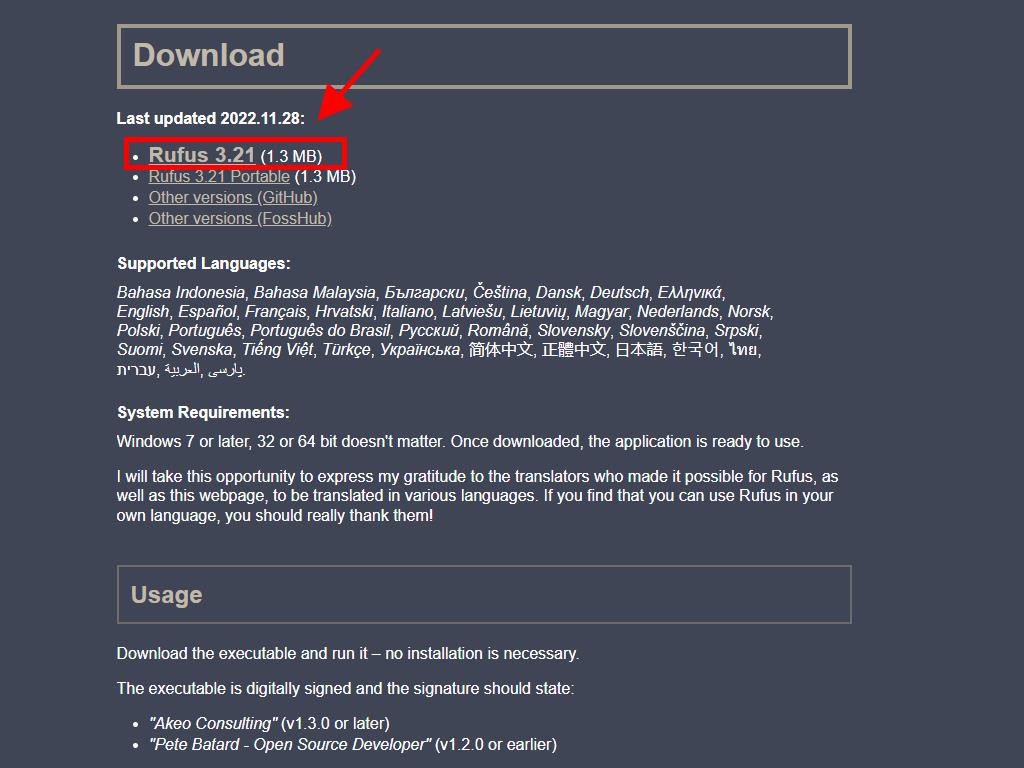
- Click here to download Rufus for free..
- Navigate to the Download section and secure the latest version of Rufus.
- Plug in the USB and launch the Rufus application.
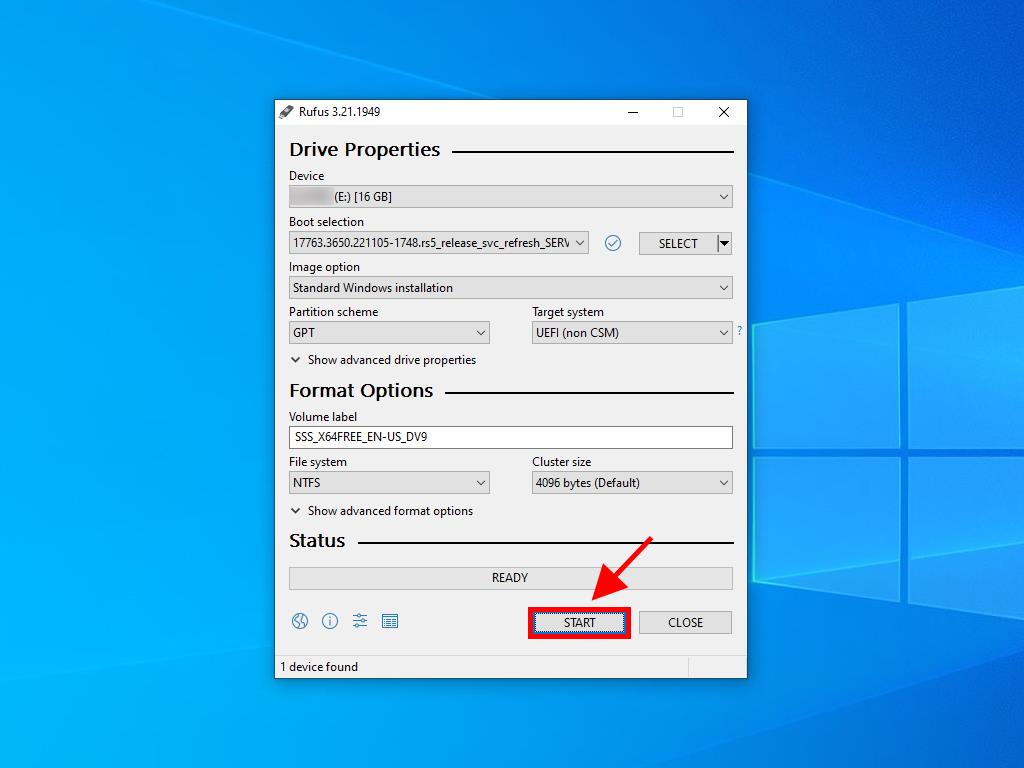
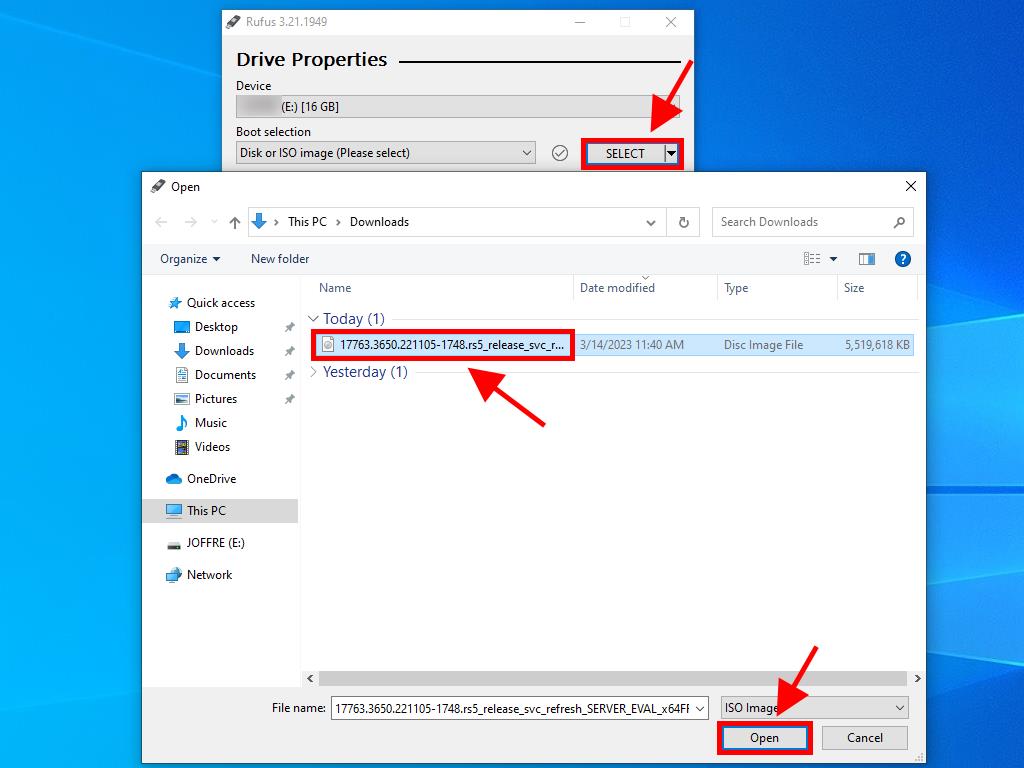
- Hit Select to locate the .iso file for Windows Server 2019 you intend to use.
- Press Start, then wait as Rufus completes the creation of the bootable USB drive.
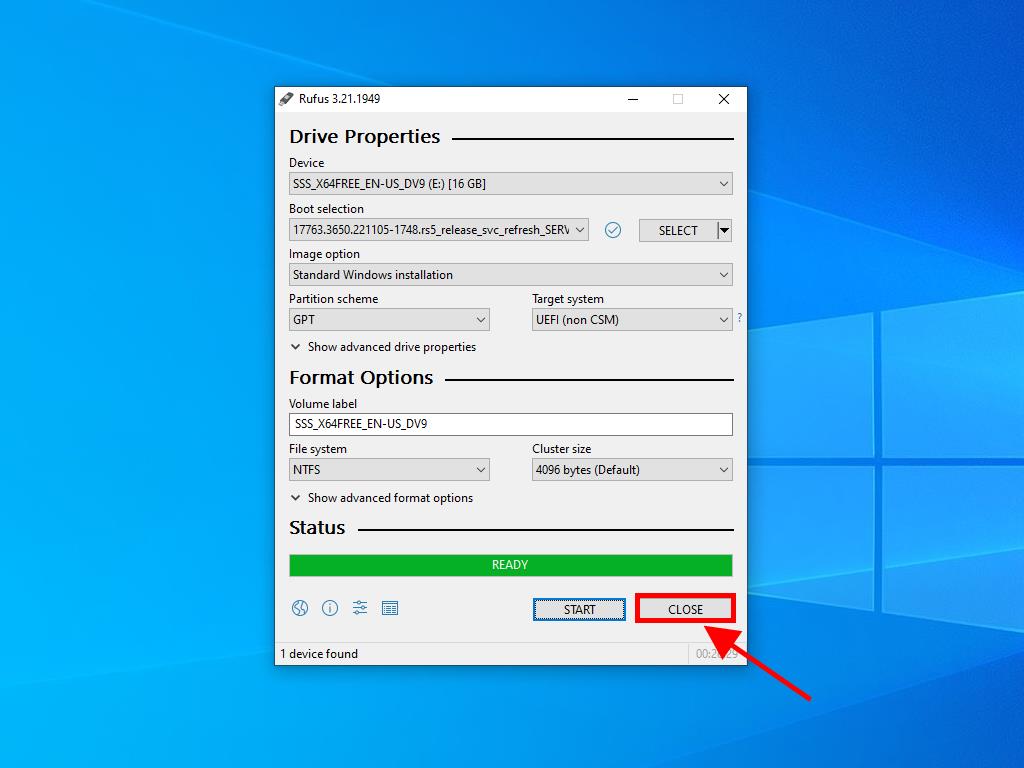
- After the setup concludes and the progress bar shows 'Ready', click Close. Your USB is now ready for the Windows Server 2019 installation.
Alert: During the 'Customize Windows Installation' pop-up, select Disable Data Collection and continue to wait for the drive preparation to finish.