Setting Up and Activating Your RDS CALs on Windows Server 2019
Set up the Remote Desktop Licensing role service and Remote Desktop Session Host with these steps:
Installing Remote Desktop Licensing Role.
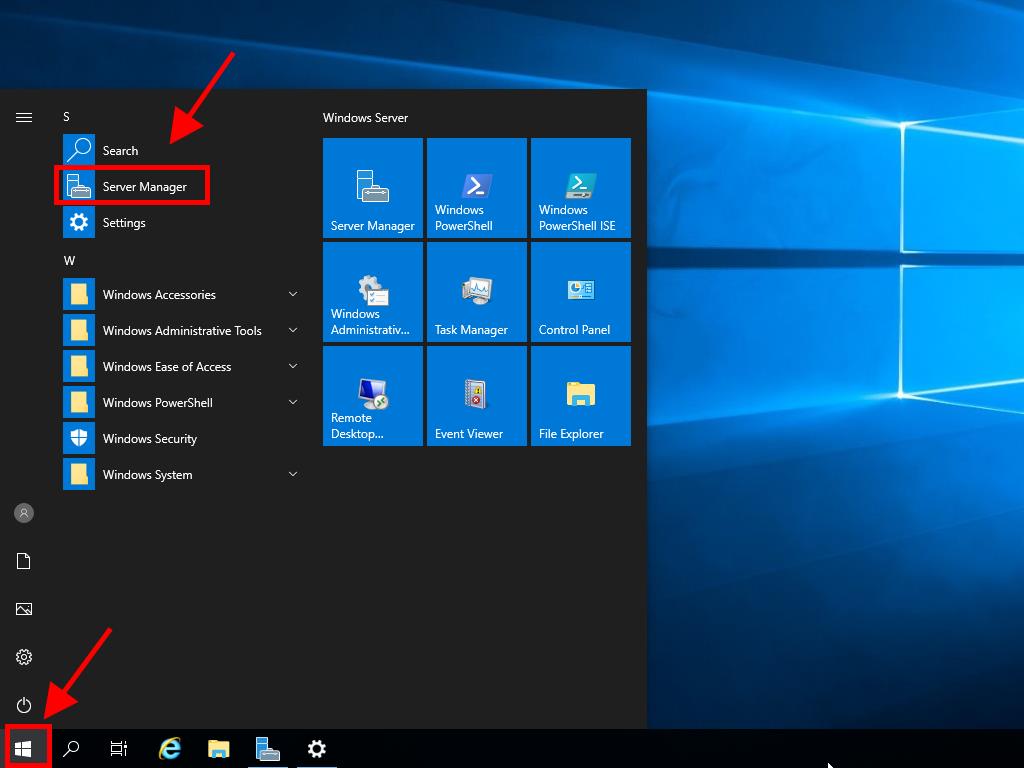
- Open Server Manager. Click on Windows, then Server Manager.
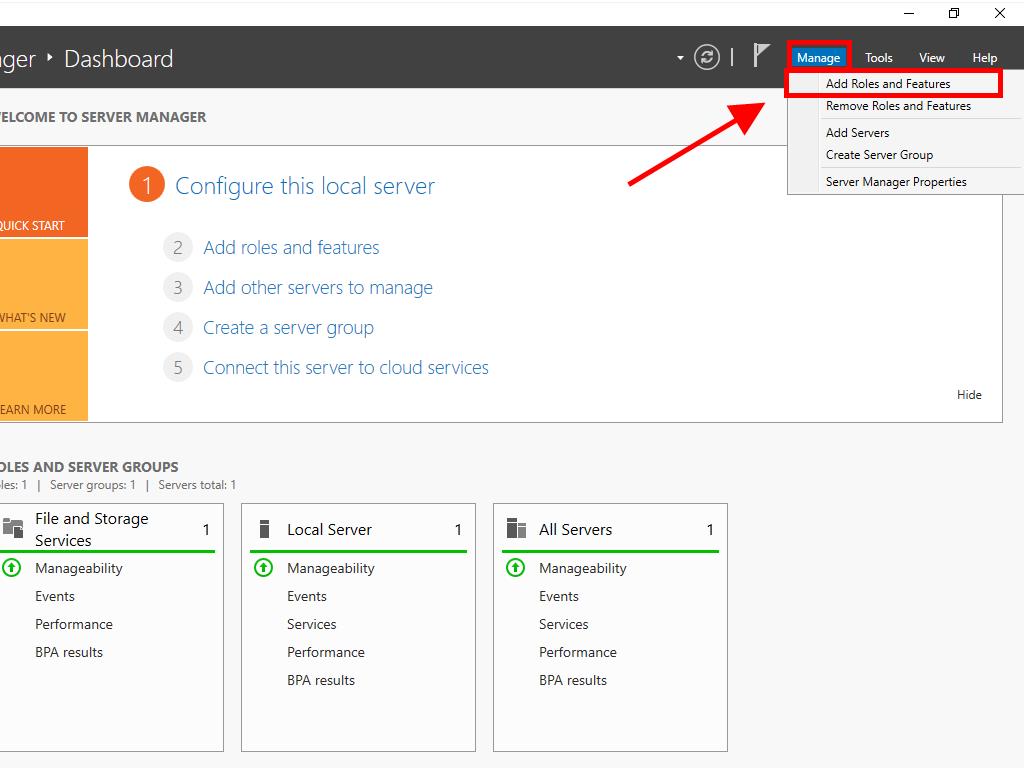
- Select Manage at the top right and click on Add Roles and Features.
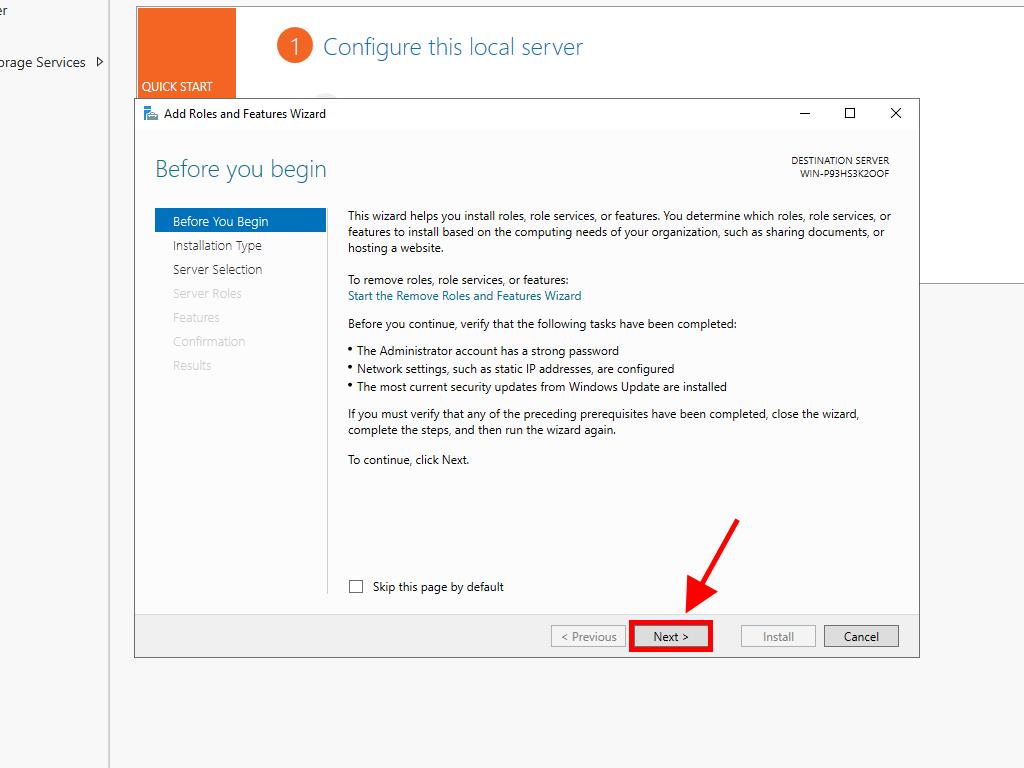
- In the Add Roles and Features Wizard, click on Next.
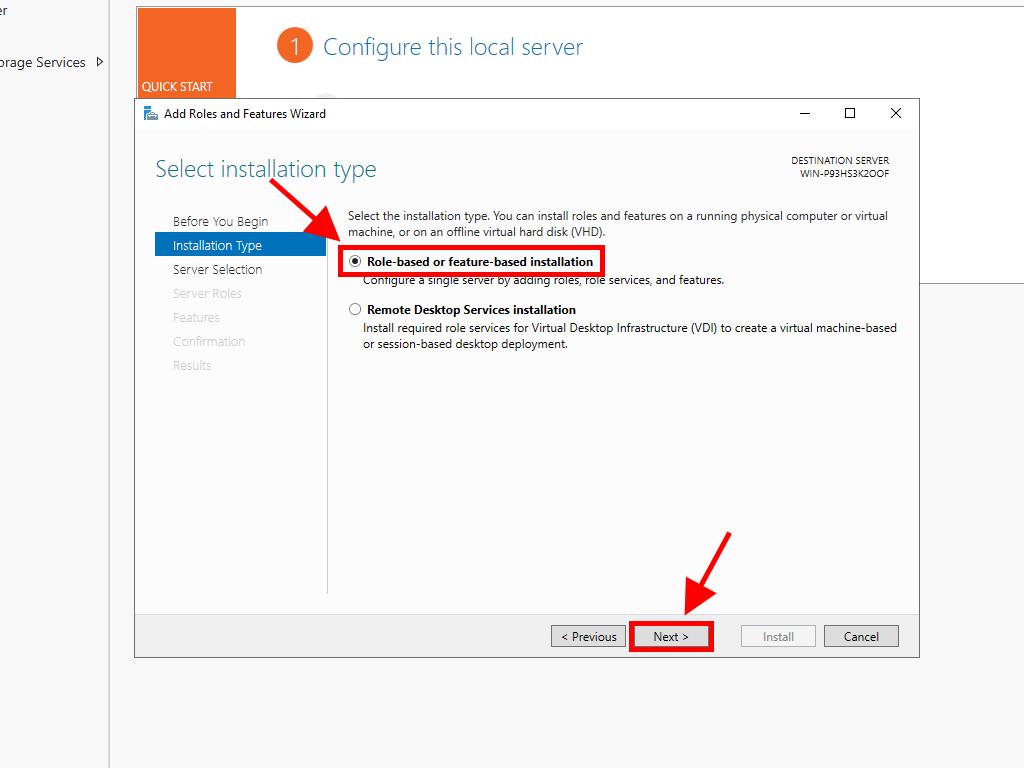
- Choose Role-based or feature-based installation and click on Next.
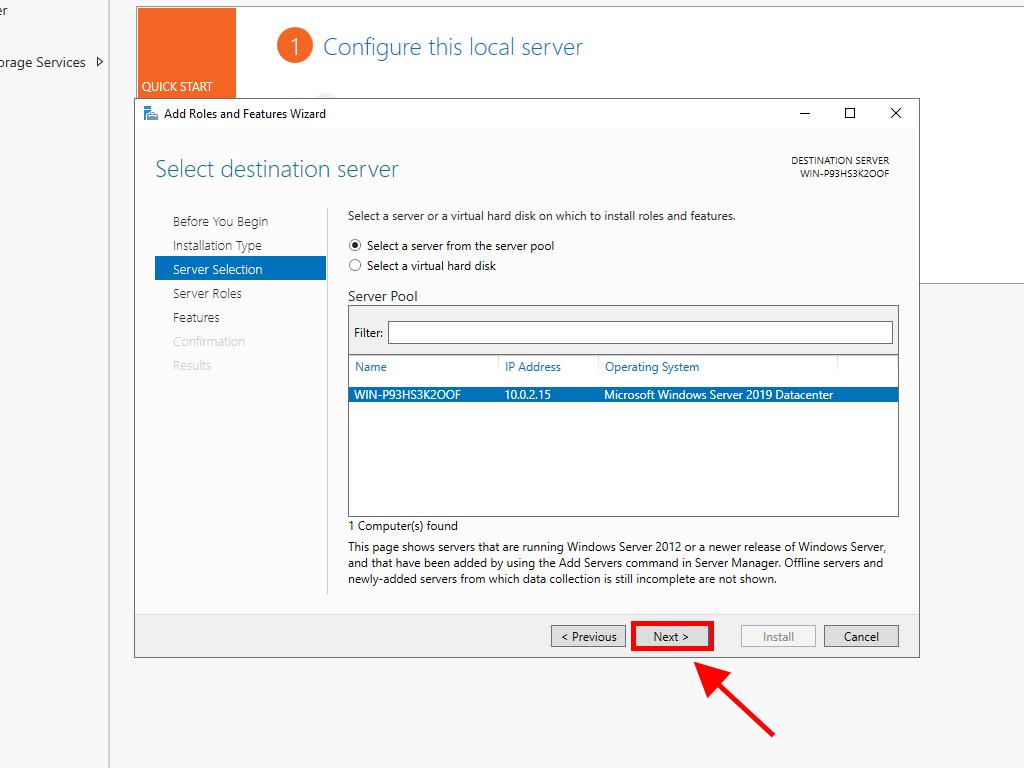
- Select the server that will install the roles and click on Next.
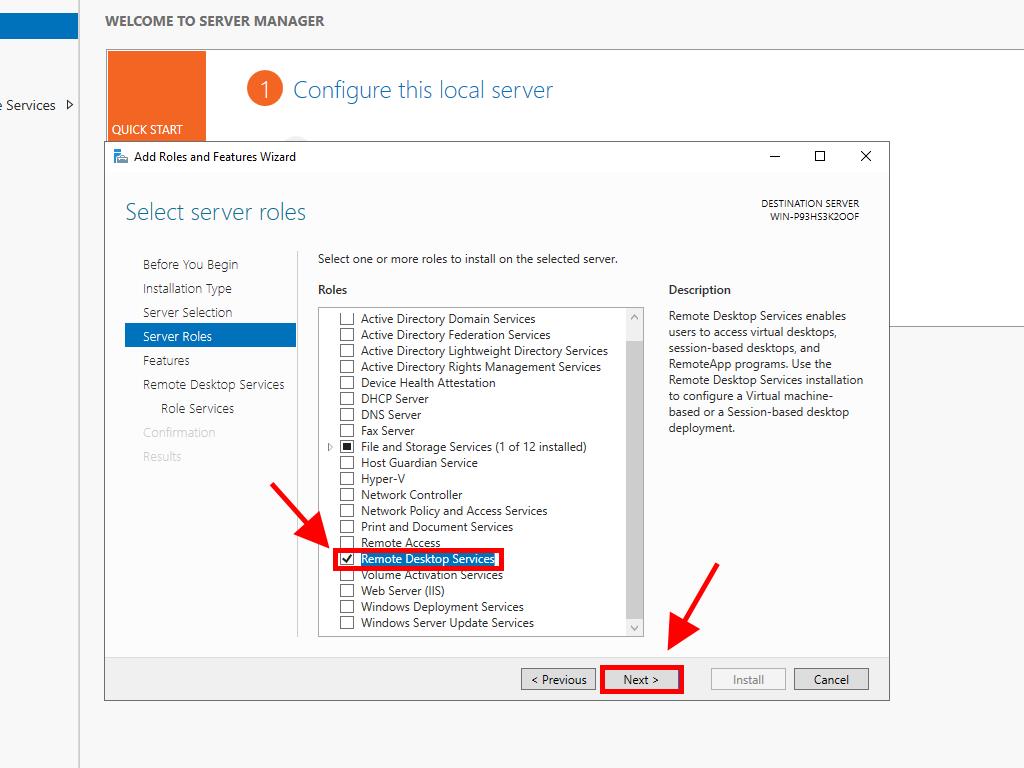
- On the Select Server Roles page, check the Remote Desktop Services box and click Next.
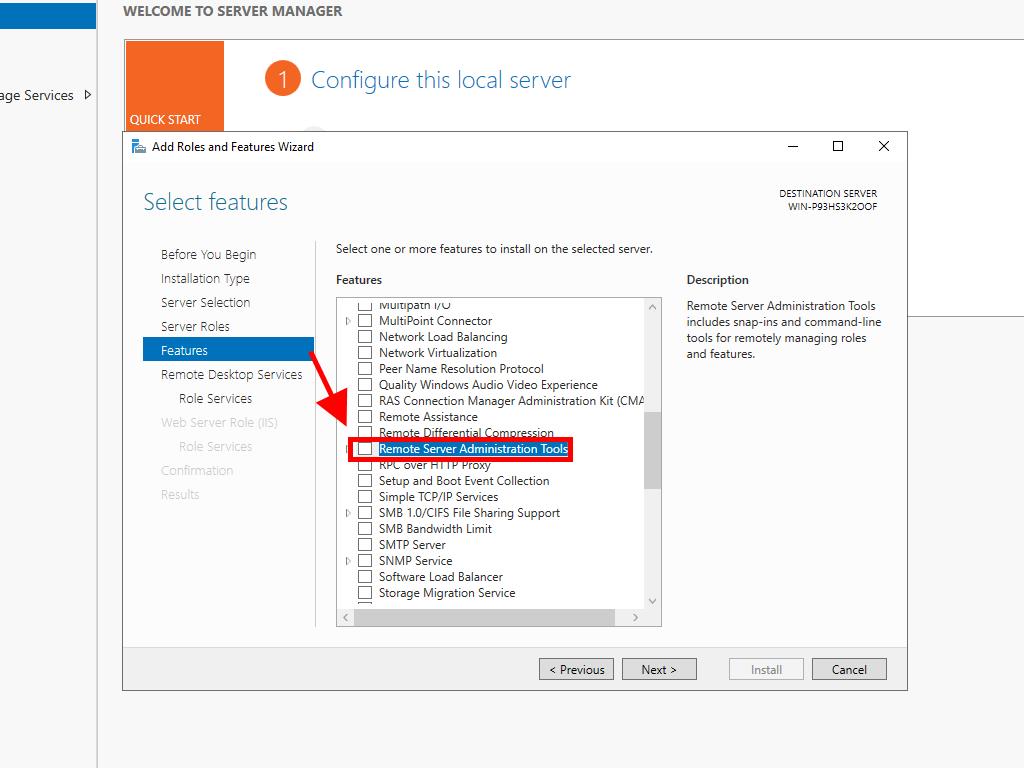
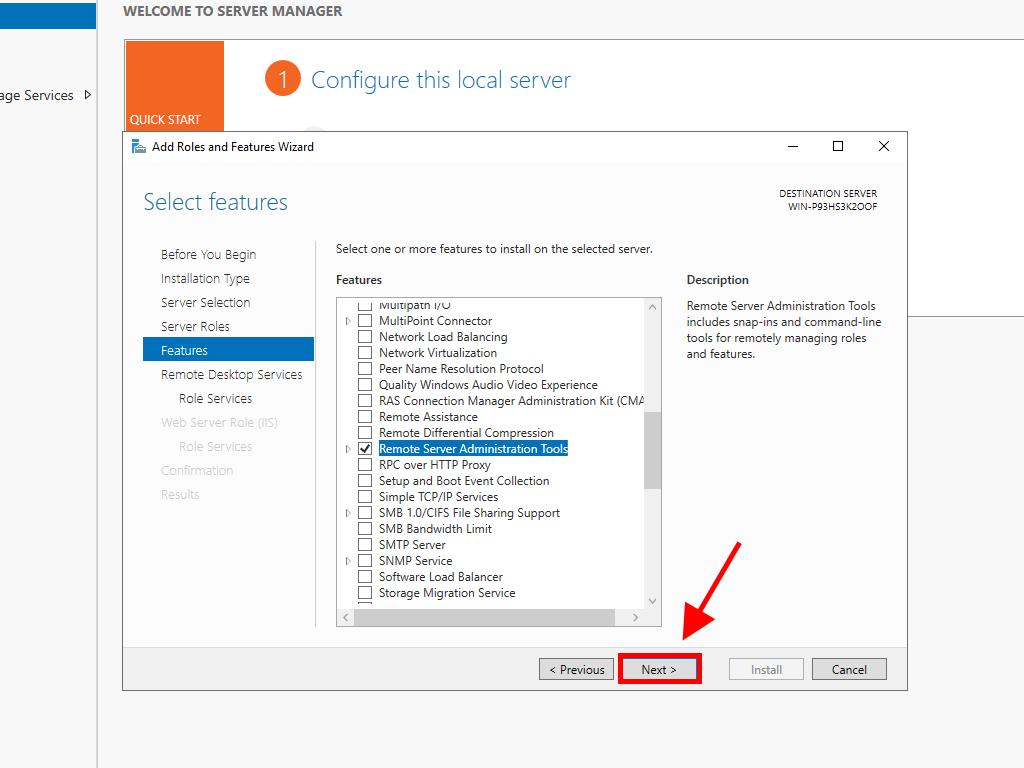
- On the Select Features page, check the Remote Server Administration Tools box.
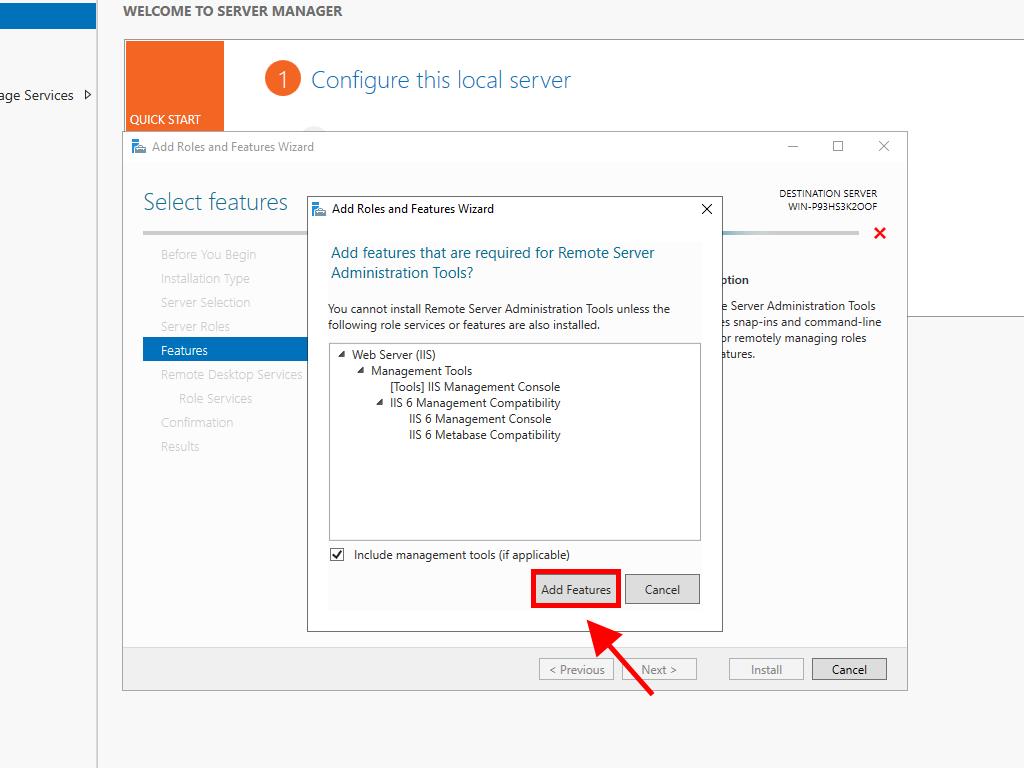
- Click on Add Features.
- Click on Next.
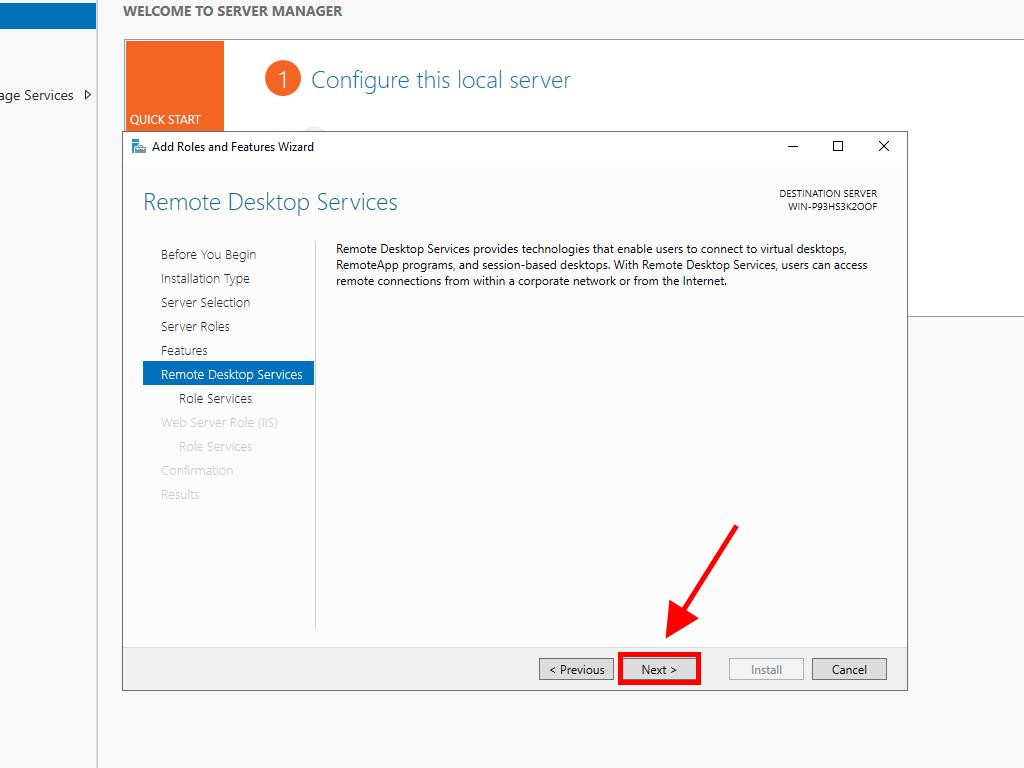
- Click Next.
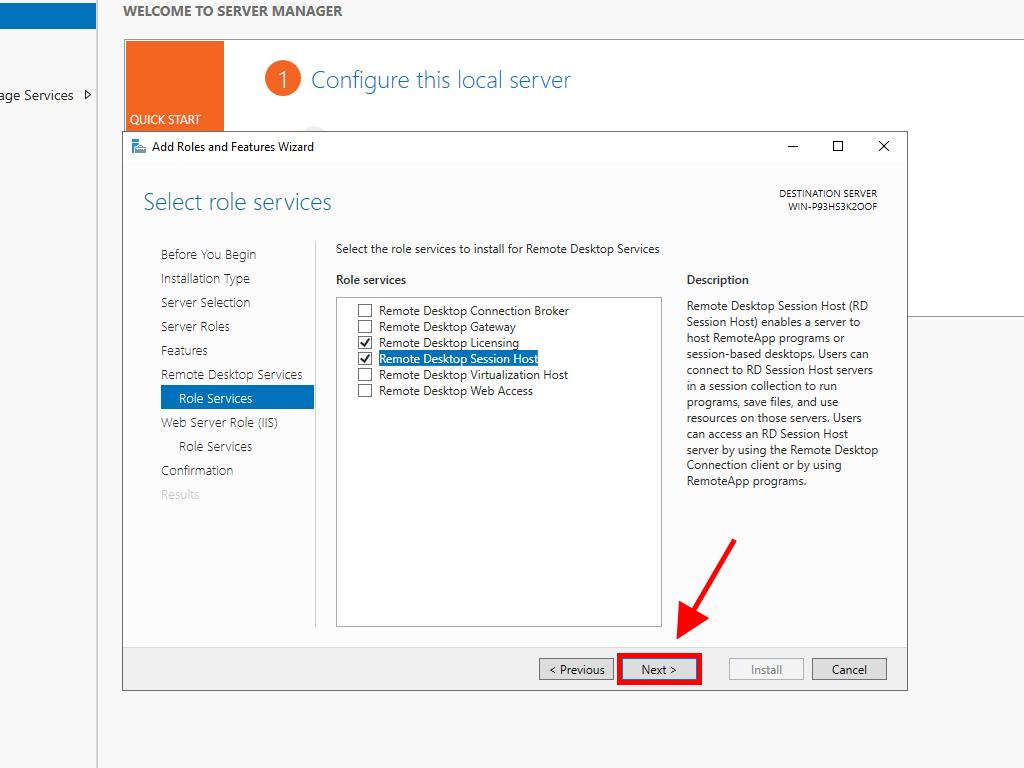
- In the following box, check Remote Desktop Licensing Management and Remote Desktop Session Host, then click Next.
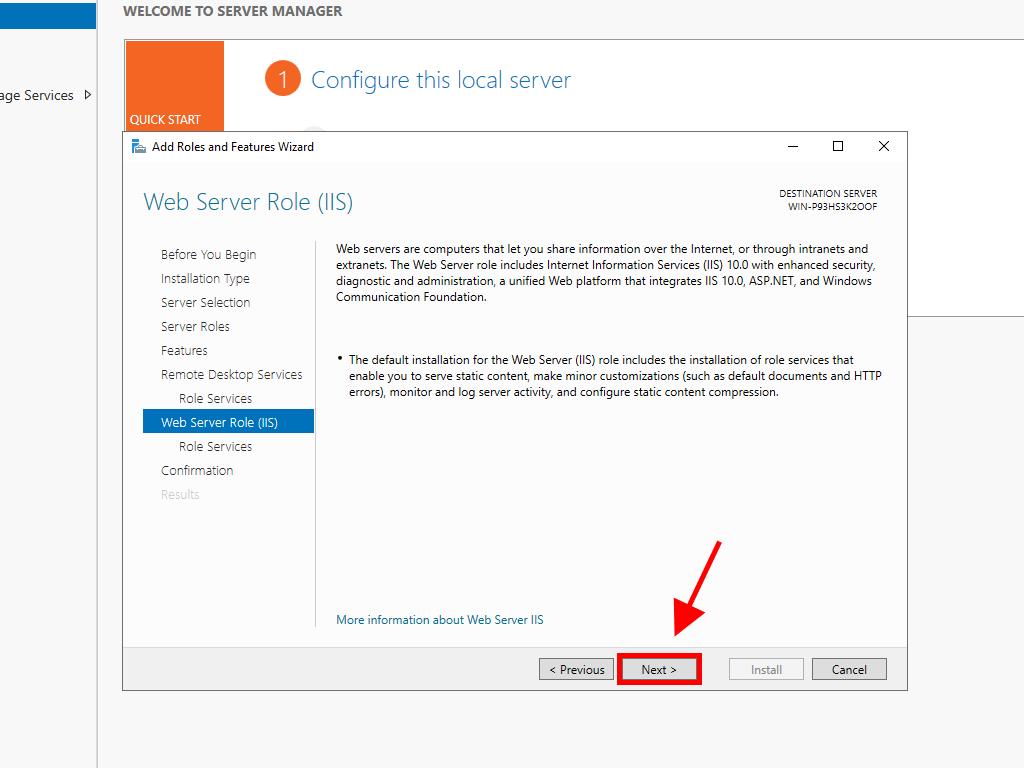
- For the Web Server role, click Next.
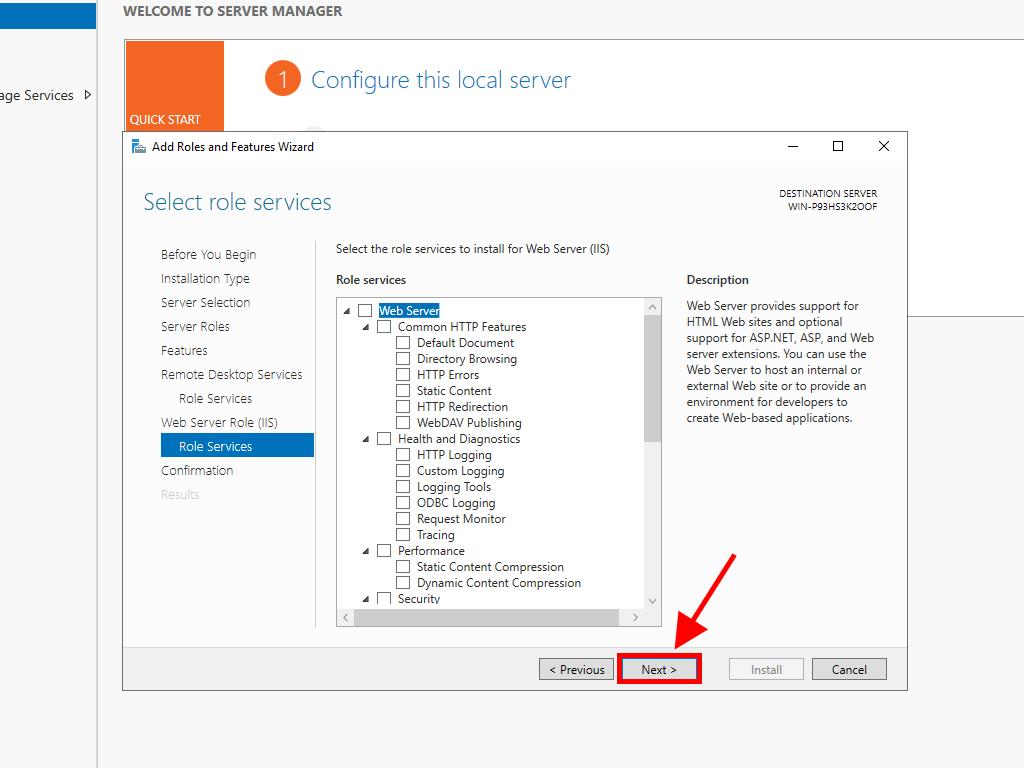
- In the Select Role Services option, click Next.
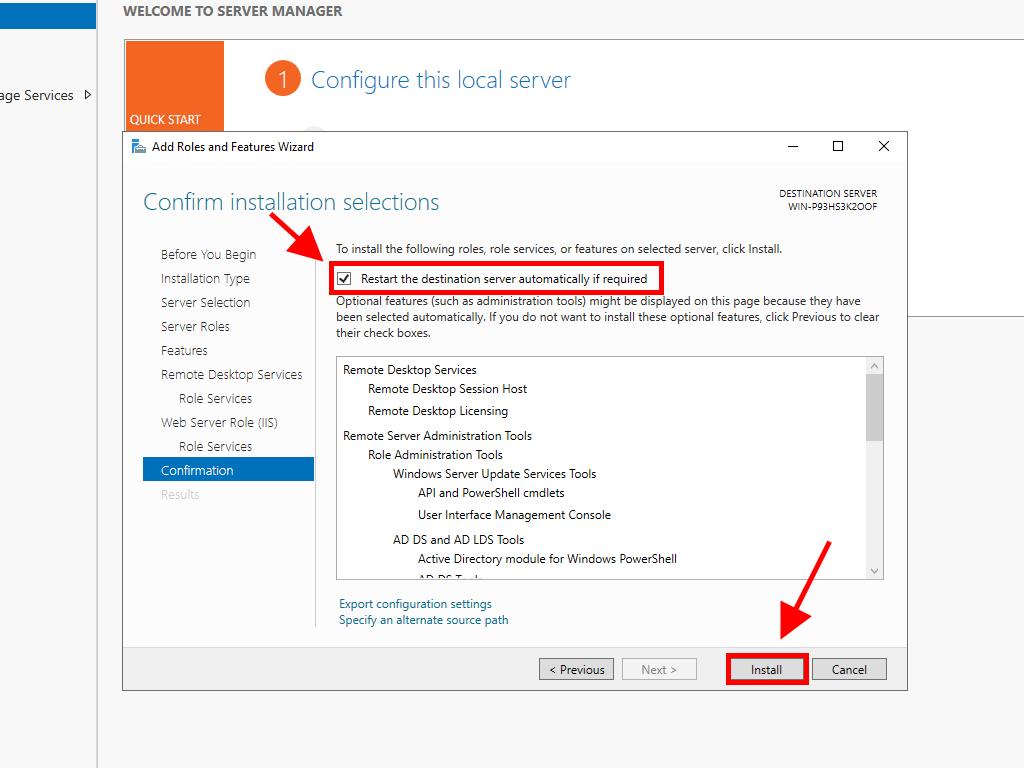
- In the next image, check the box for Automatically Restart the Server and click on Install. Wait for the roles to install.
- After the roles are installed, proceed to the next step to configure your remote desktop service.
Activating the Licensing Server
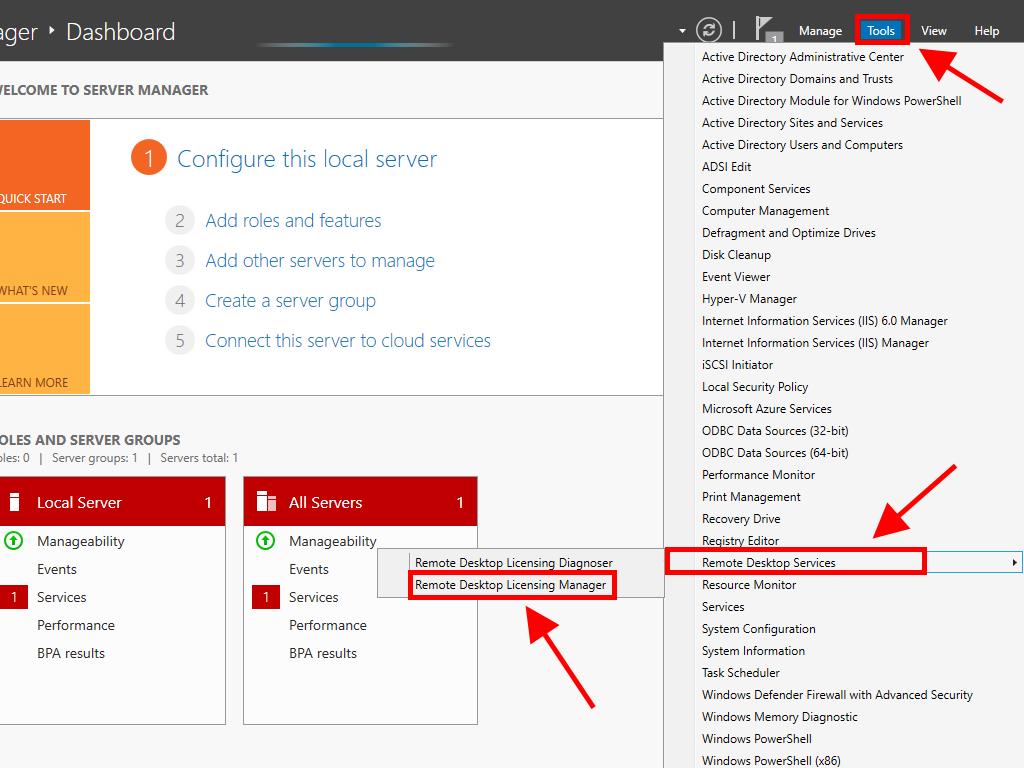
- Select Tools at the top right, then Remote Desktop Services, and click on Remote Desktop Licensing Manager.
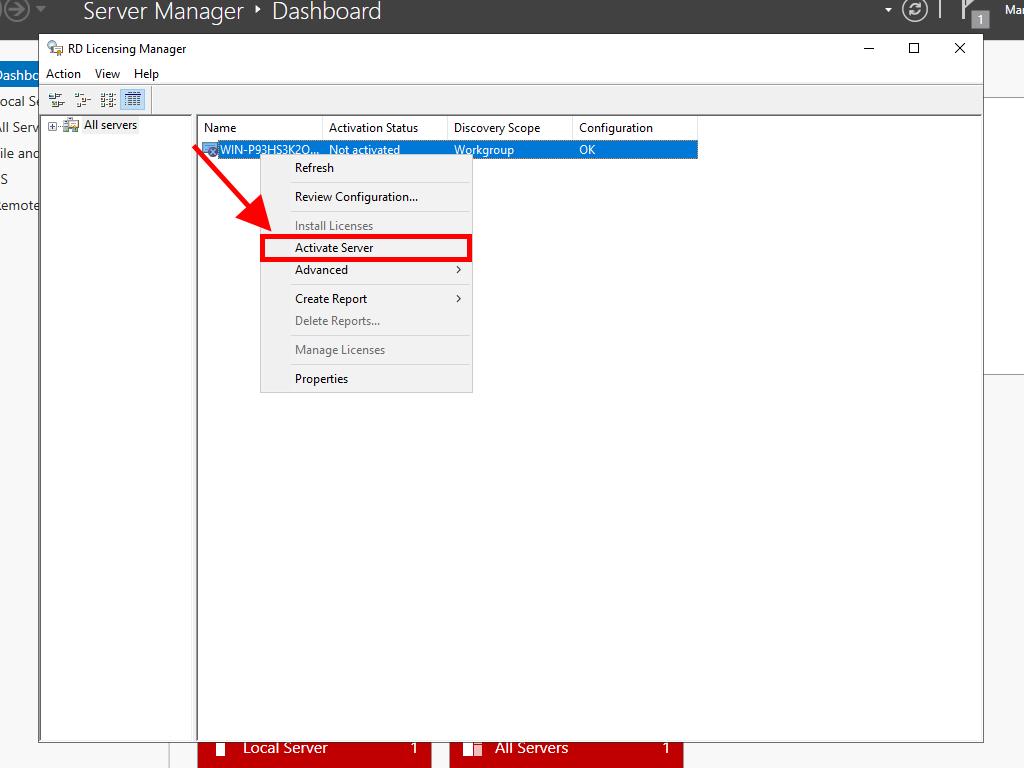
- Right-click on the server and select Activate Server.
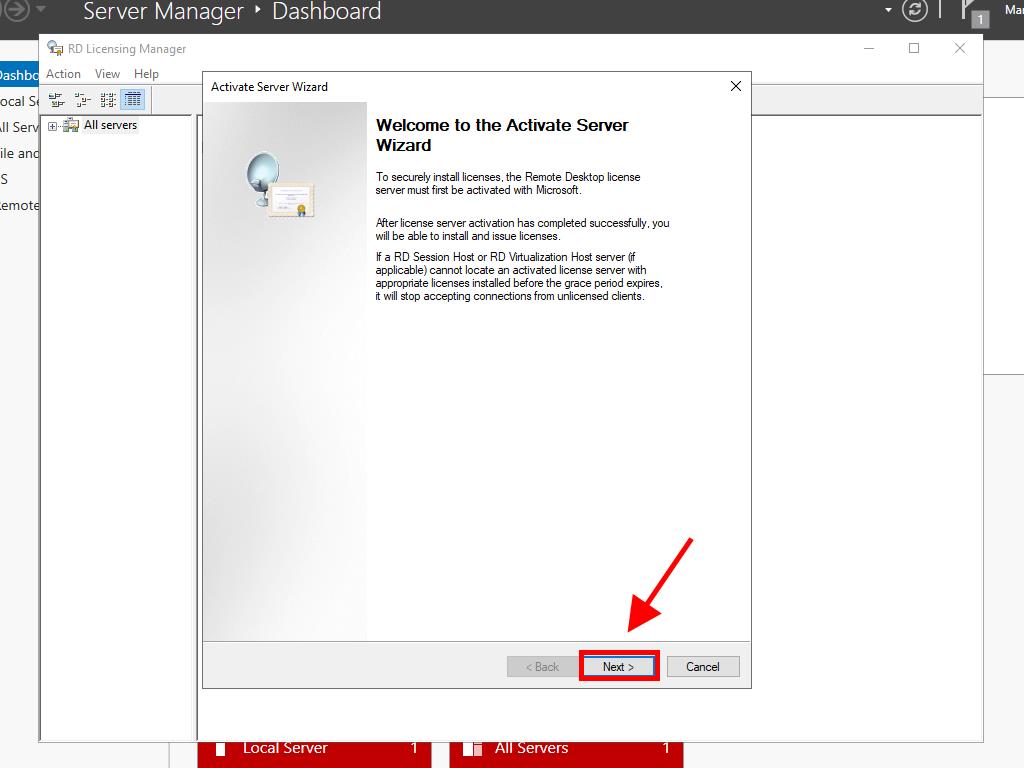
- You will see the server activation wizard. Click Next.
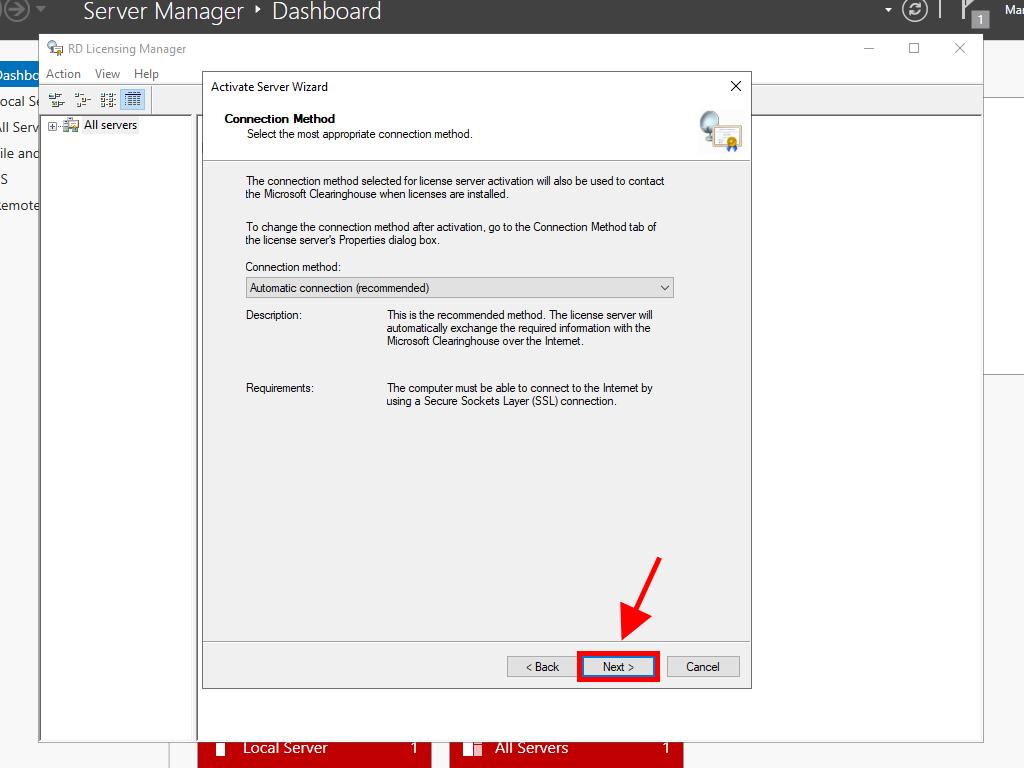
- Choose the automatic connection method and click Next.
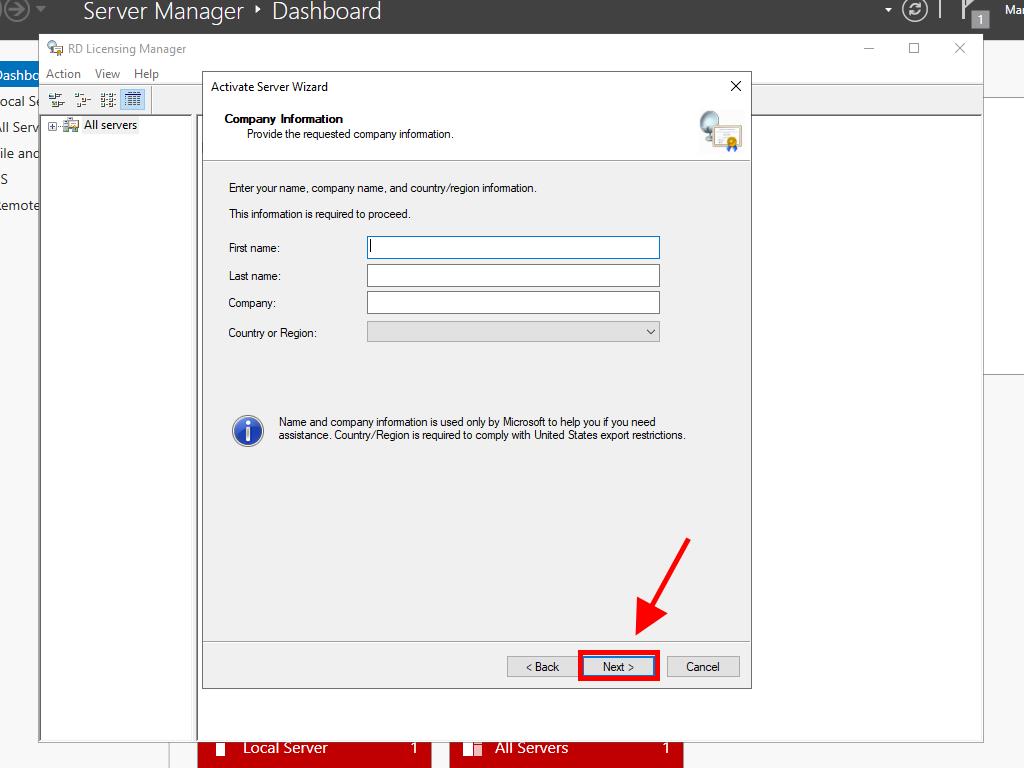
- Enter the required information (first name, last name, region, and company name). Click Next.
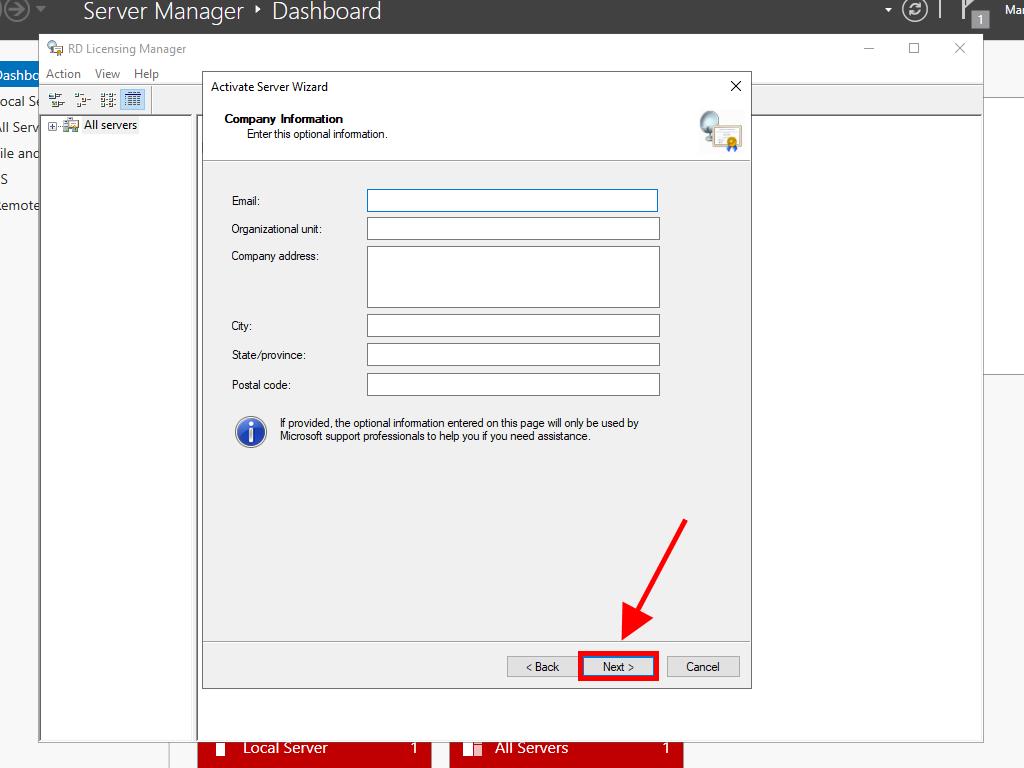
- Enter the company details and click Next.
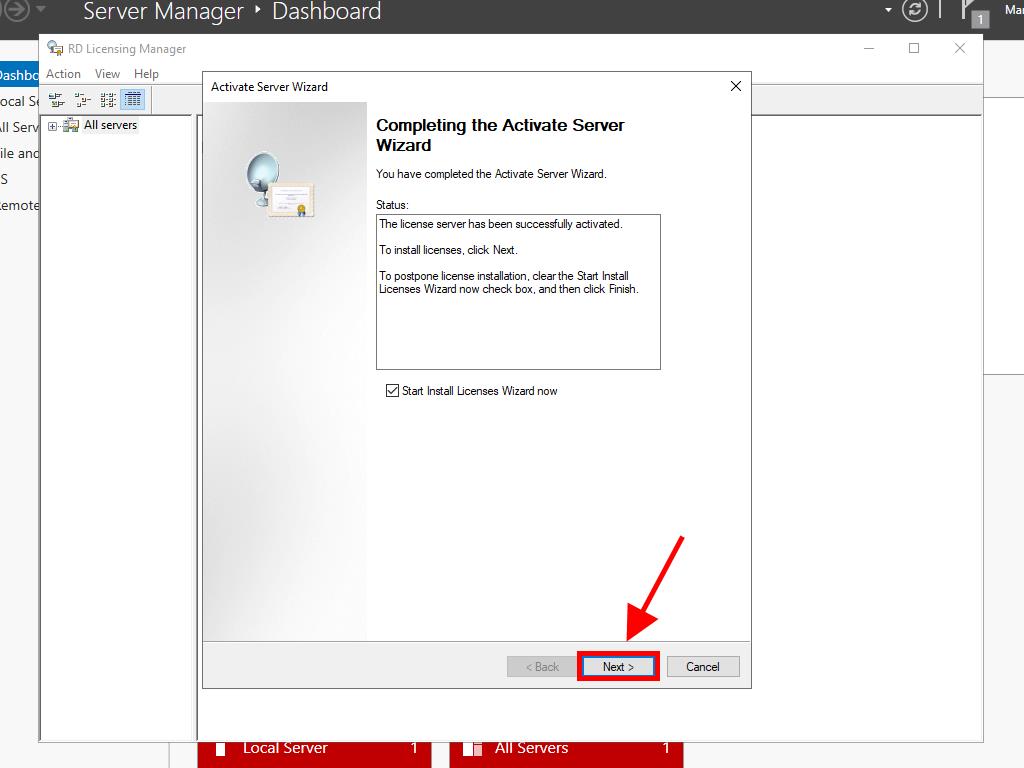
- You will see the server activation wizard. Click Next.
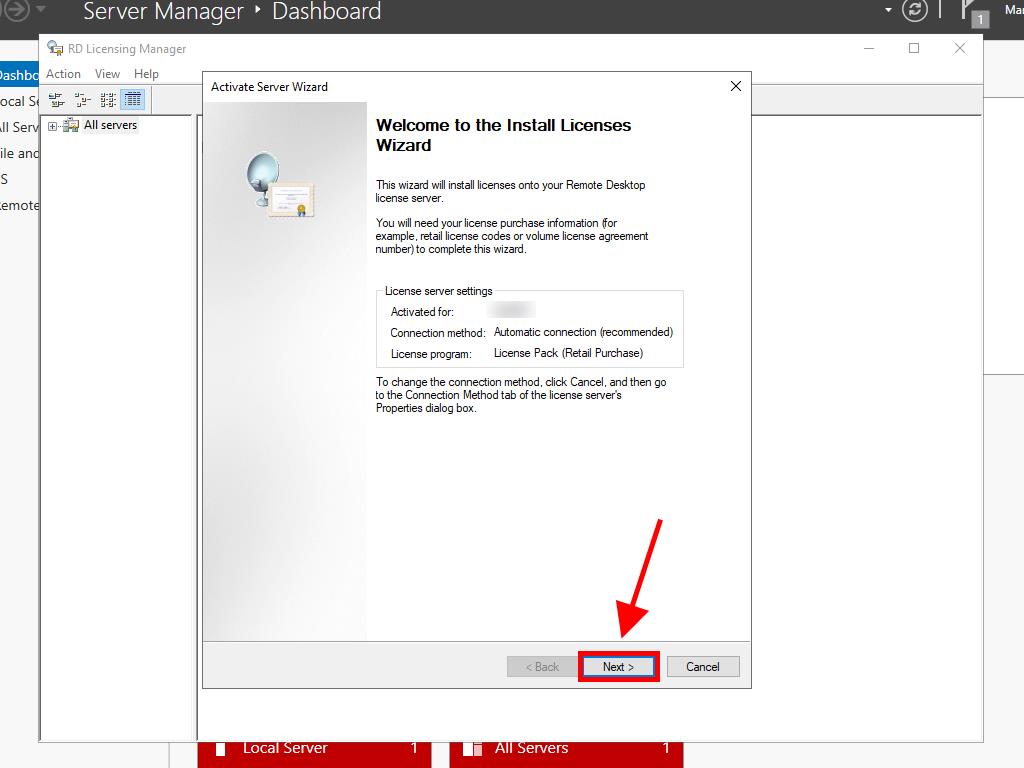
- You will be reminded of your server setup. Click Next.
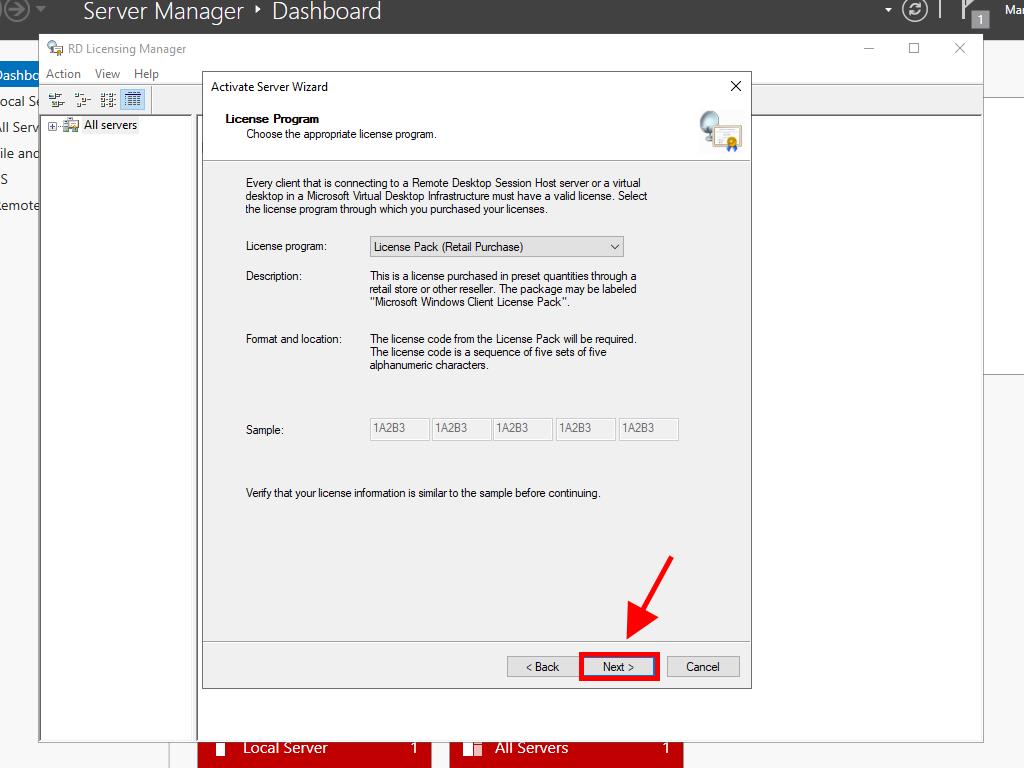
- Under License Program, select Lic. Pack. (Box or pre-packaged product). Click Next.
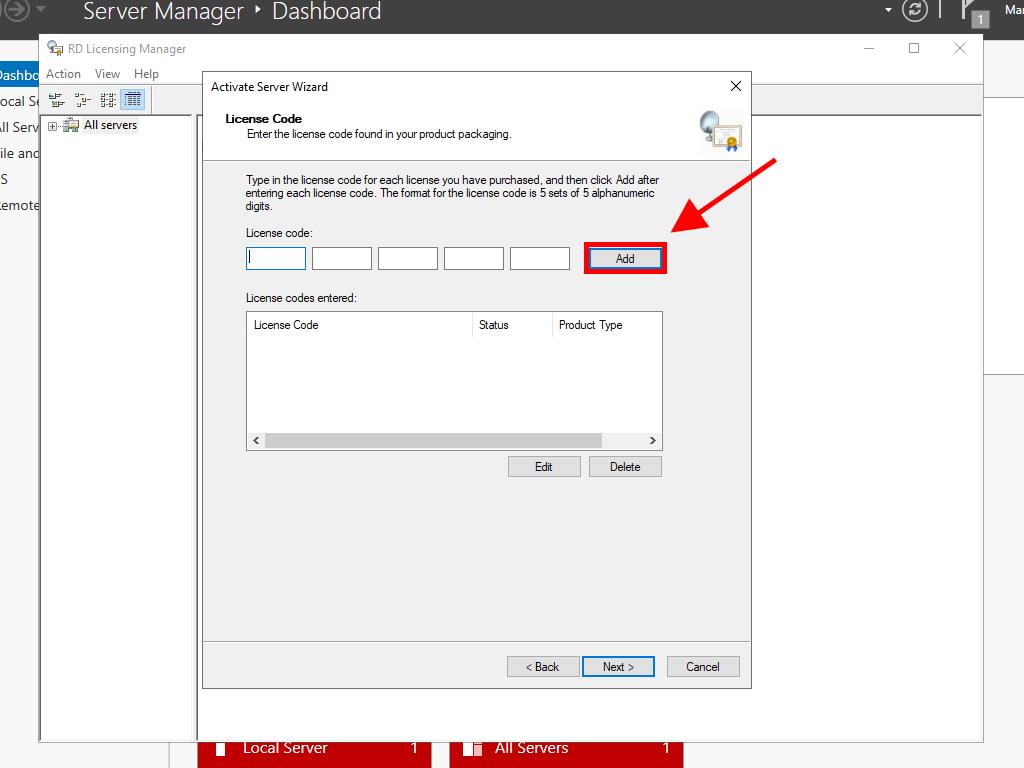
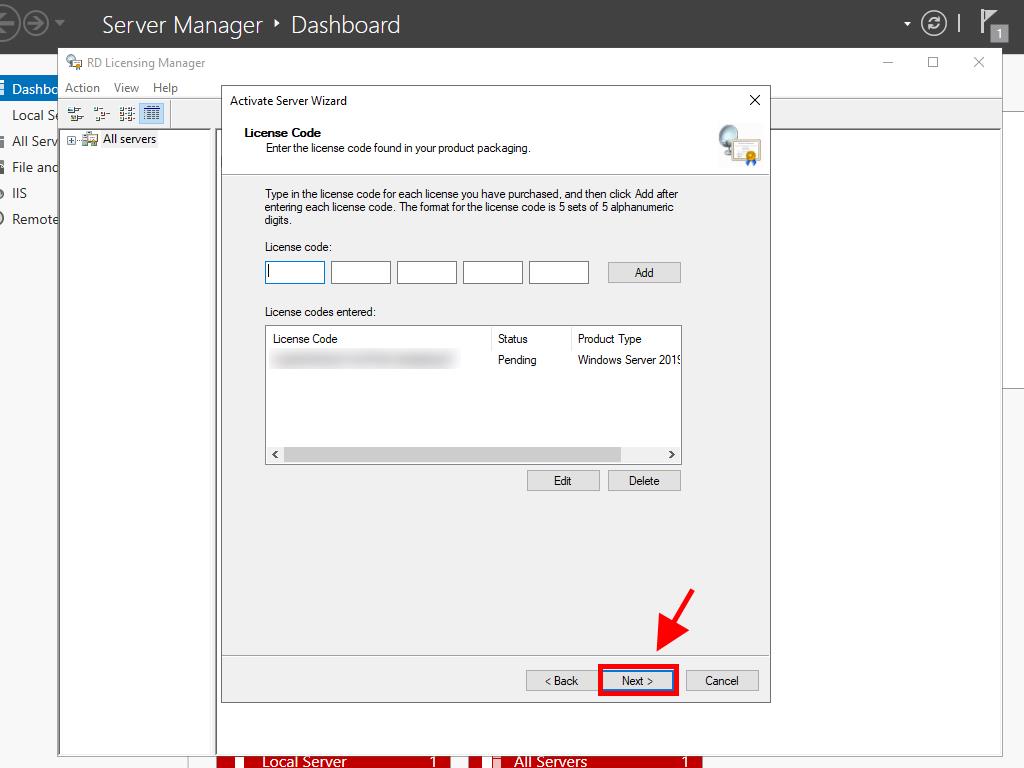
- Enter your RDS CALs product key and click Add.
- After the license is recognized, click Next.
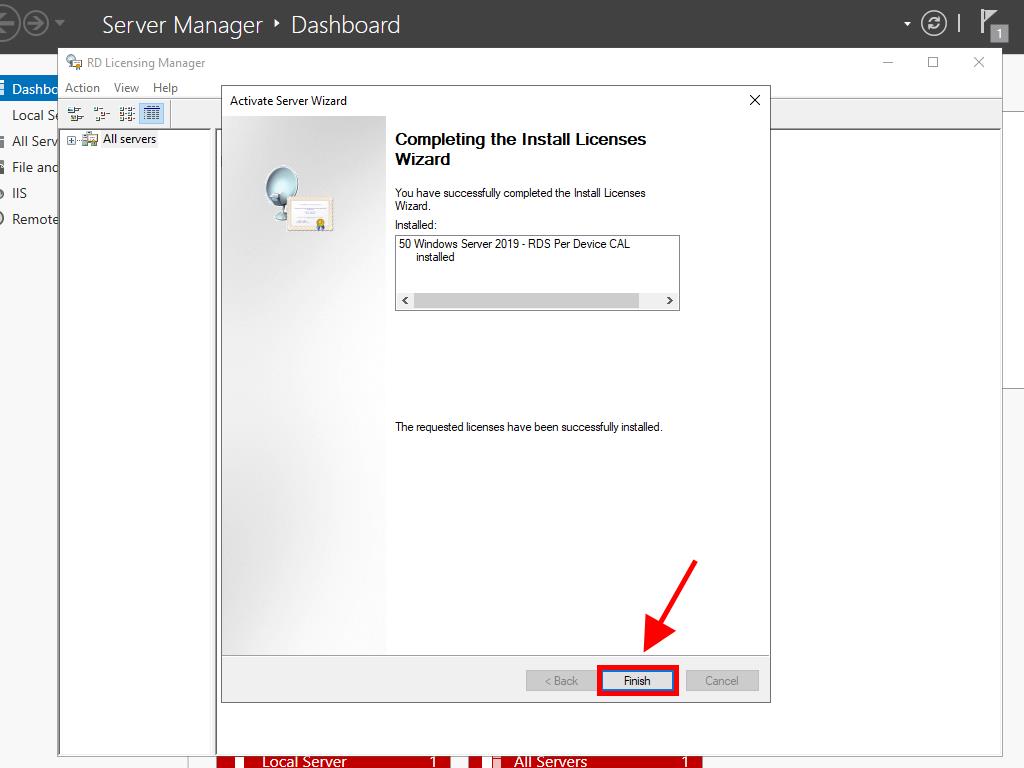
- The License Installation Wizard will confirm a successful installation. Click Finish.
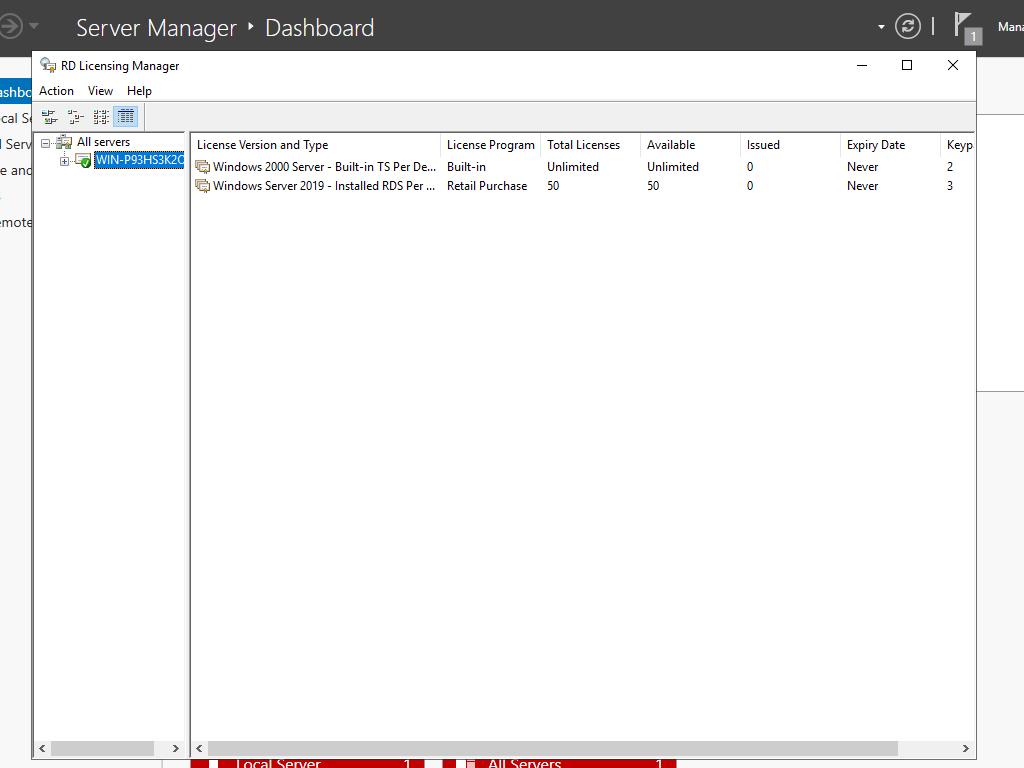
- Your licensing server is now ready to issue and manage licenses. Check by selecting your server's name to see available licenses and those issued. Initially, it should show zero.
 Sign In / Sign Up
 Orders
 Product Keys
 Downloads
