How to Execute a Clean Installation of Windows Server 2022?
Begin by preparing a bootable USB drive. Once ready, proceed with these detailed installation instructions:
- Power on your server to initialize Windows; insert the bootable Windows Server USB and then reboot your server.
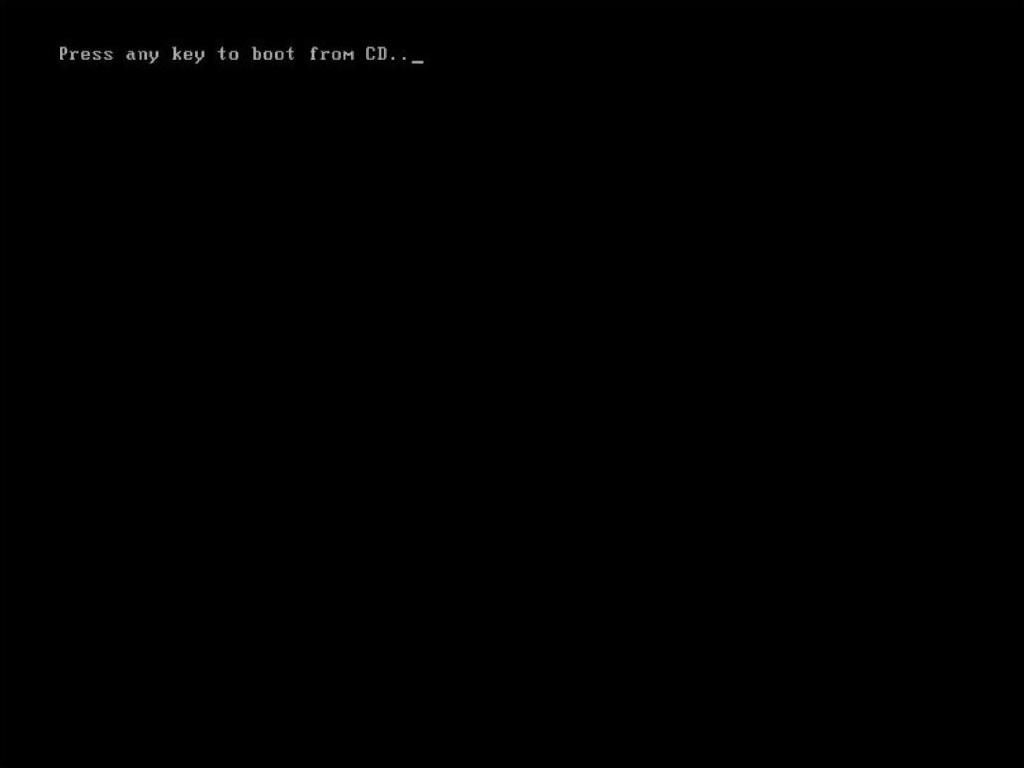
- The system will initiate from the USB. When prompted with the message Press any key to boot from CD or DVD, do so.
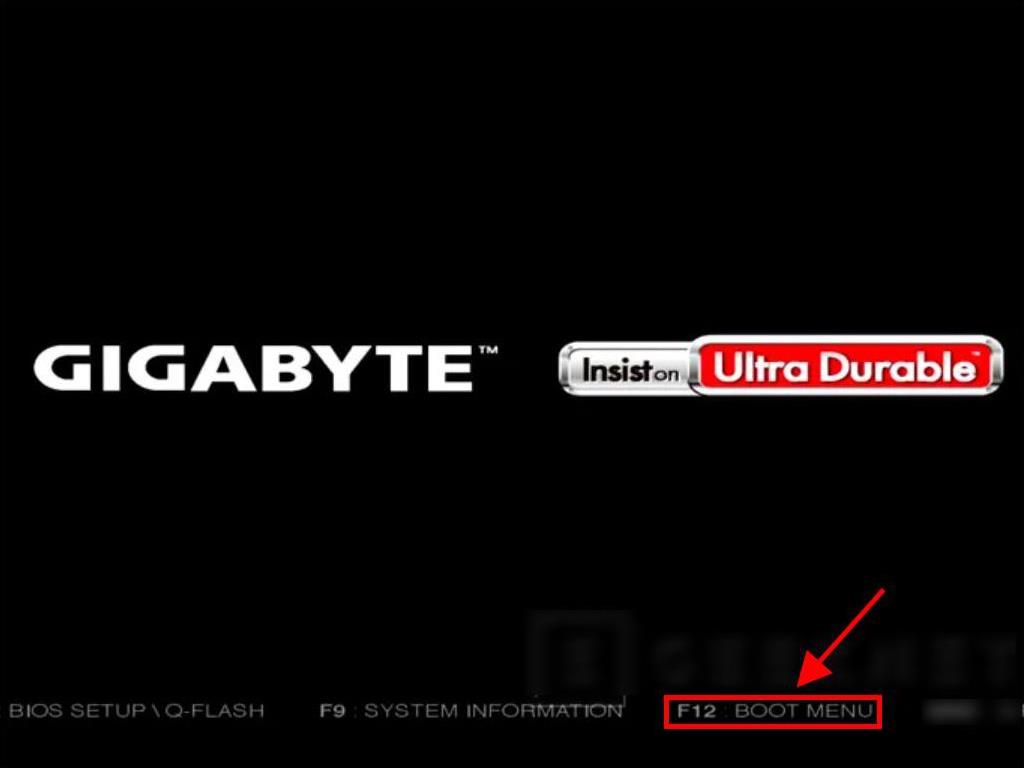
- Reboot your server, and when the logo of your server's manufacturer displays, press the key for the boot menu, typically F2, F10, F11, F12, or Del.
- Adjust the boot sequence to USB first.
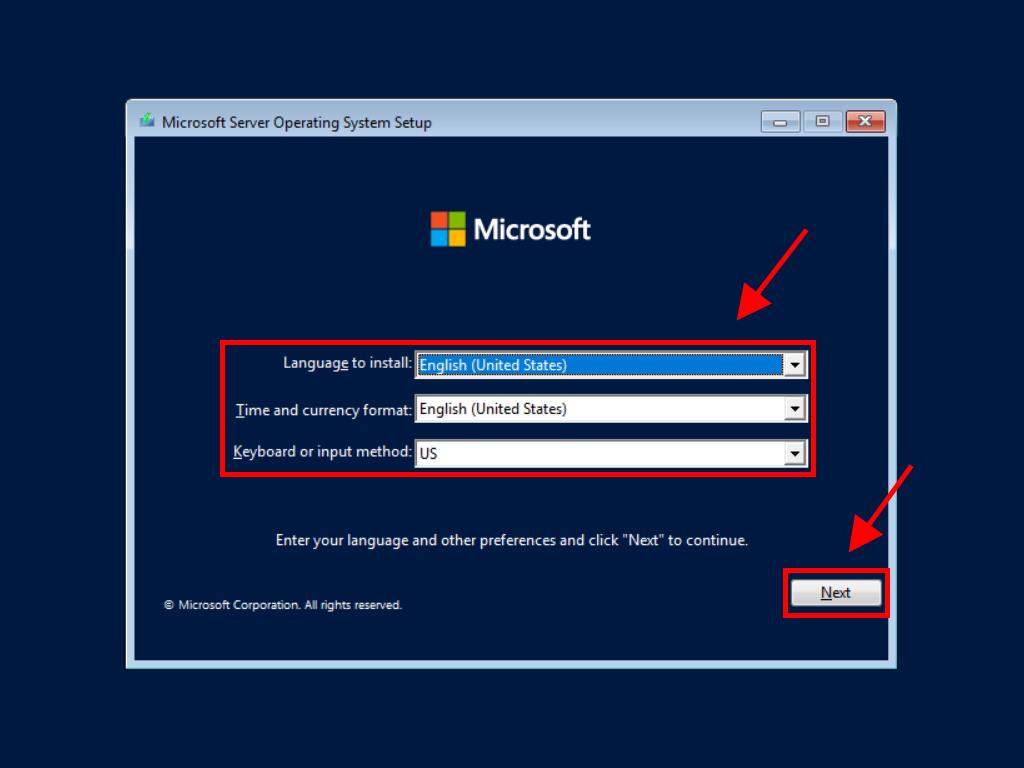
- At the setup interface, select your preferred language, time, currency format, and keyboard or input method, then click Next.
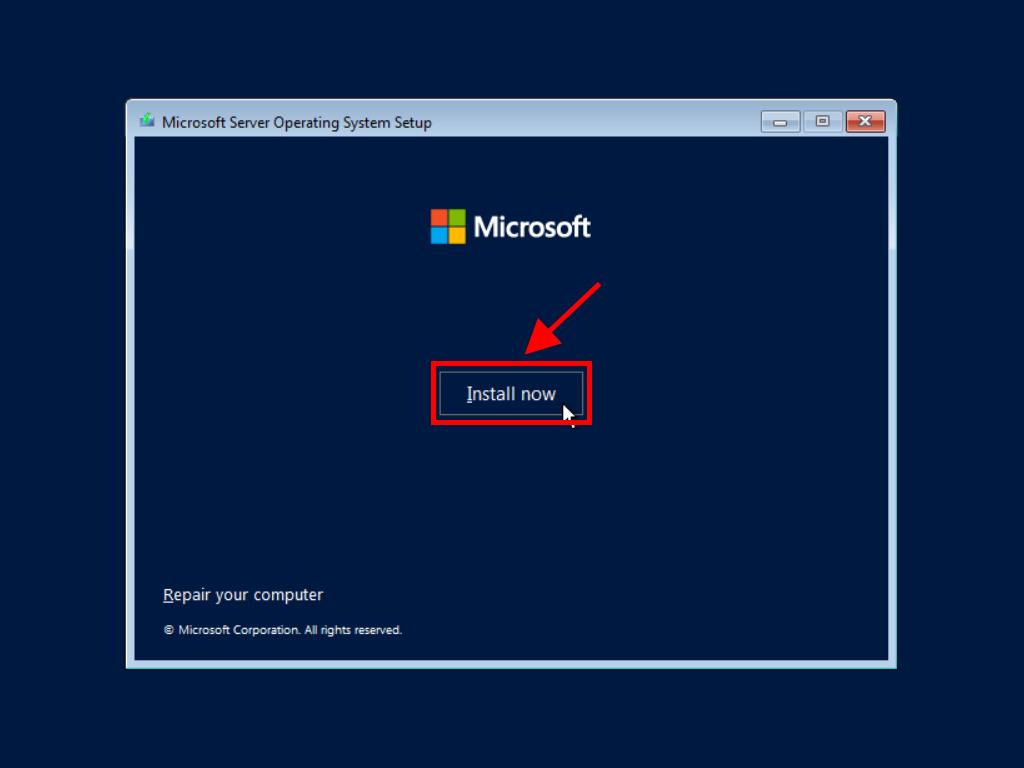
- Click Install now to begin the installation.
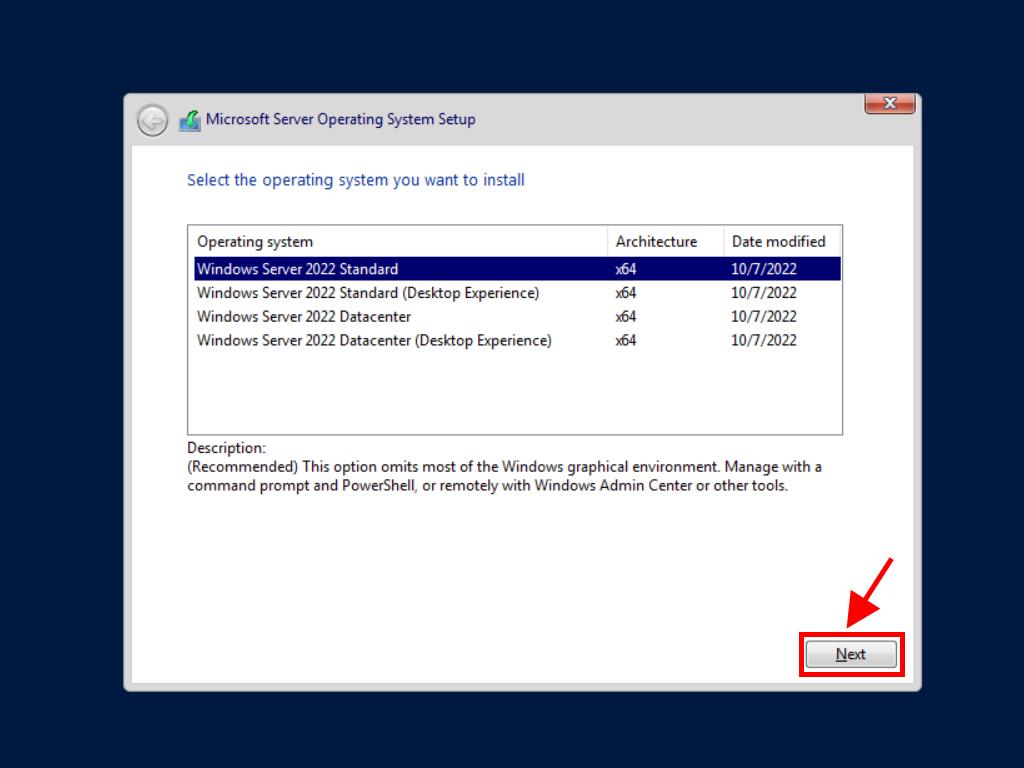
- Select the Server edition for installation and proceed by clicking Next.
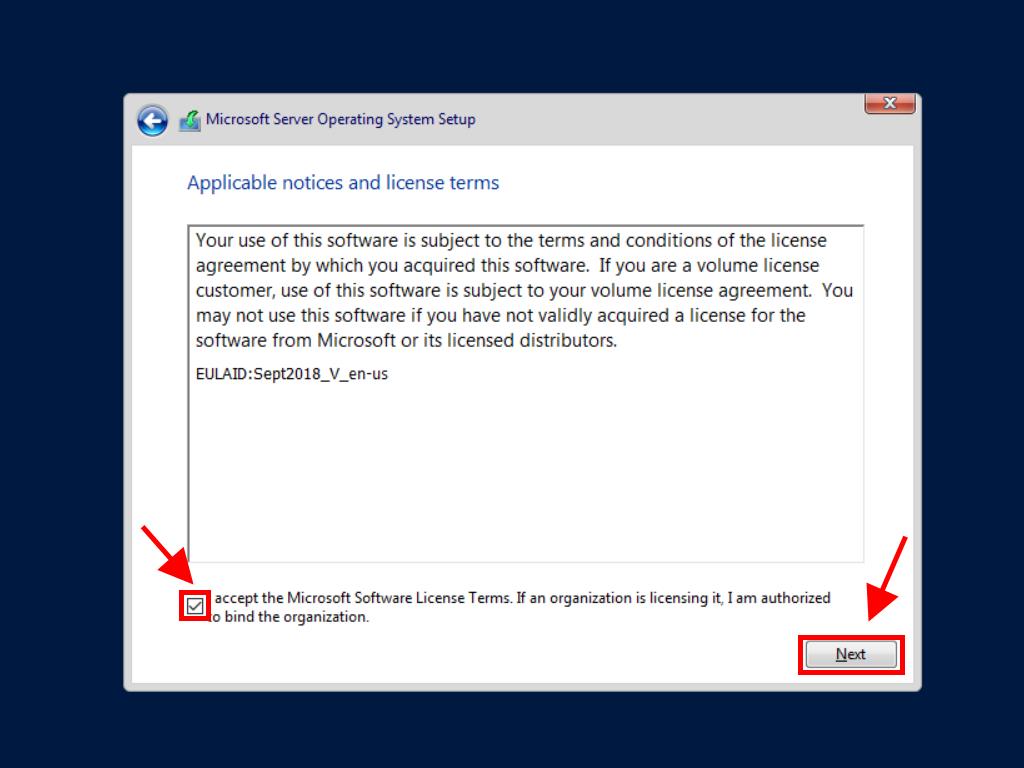
- Agree to the license terms by clicking Next.
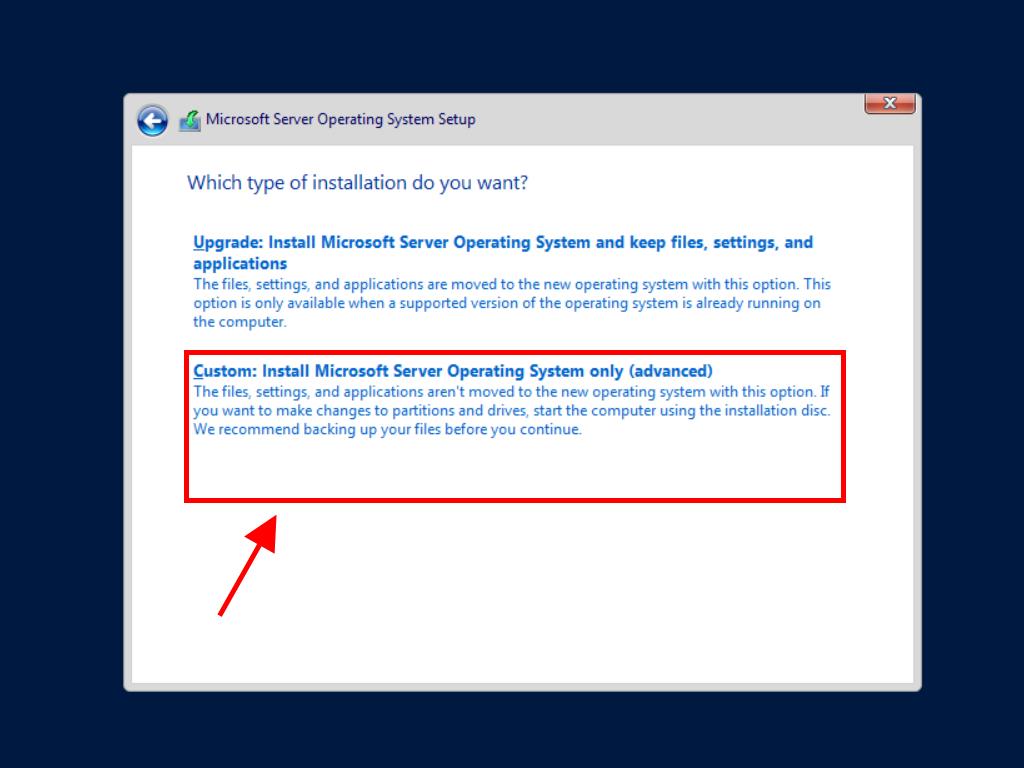
- Choose Custom: Install Microsoft Server Operating System only (advanced).
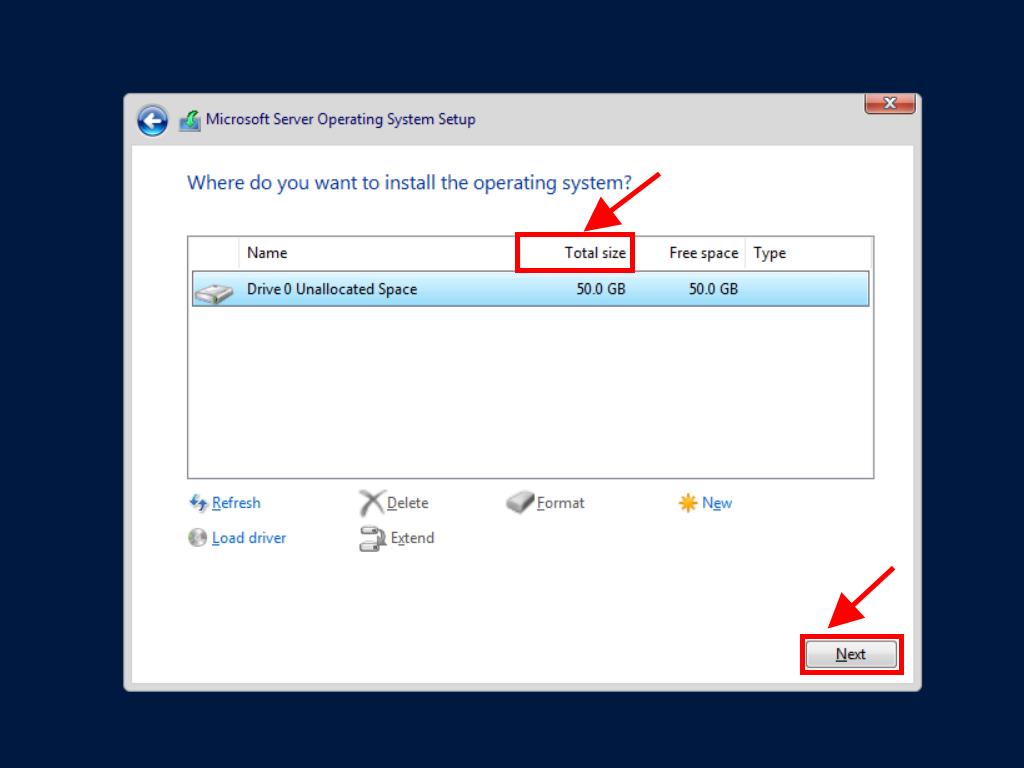
- Choose the hard drive where Windows Server will be installed and click Next.
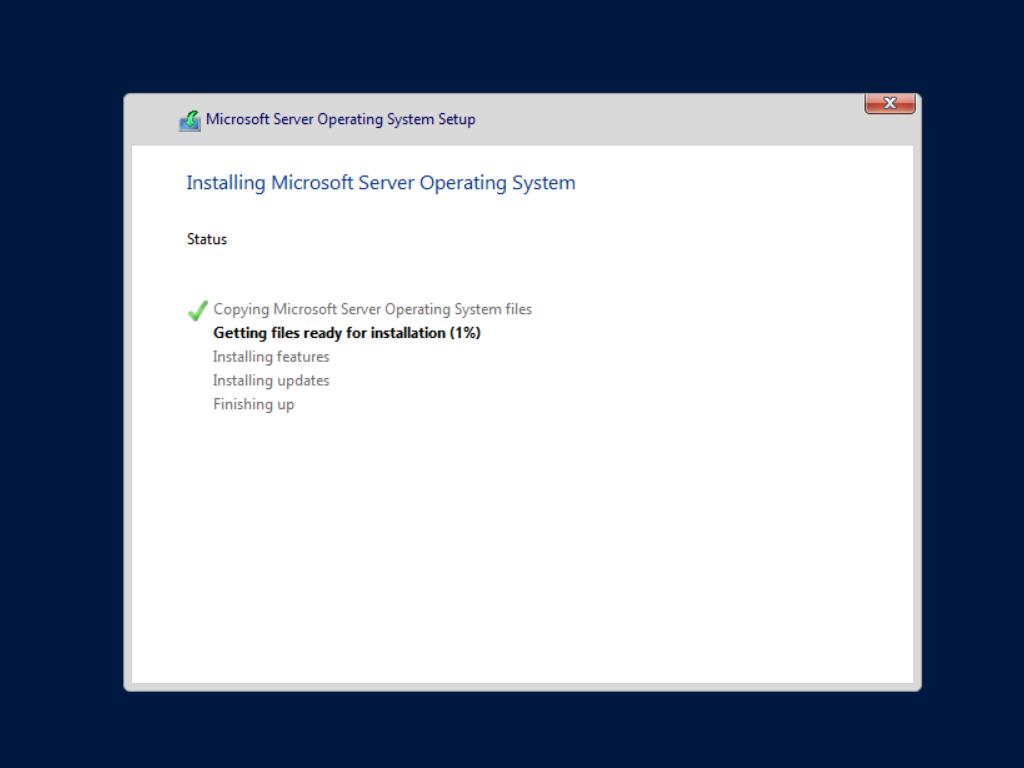
- Installation will commence and complete in a few minutes.
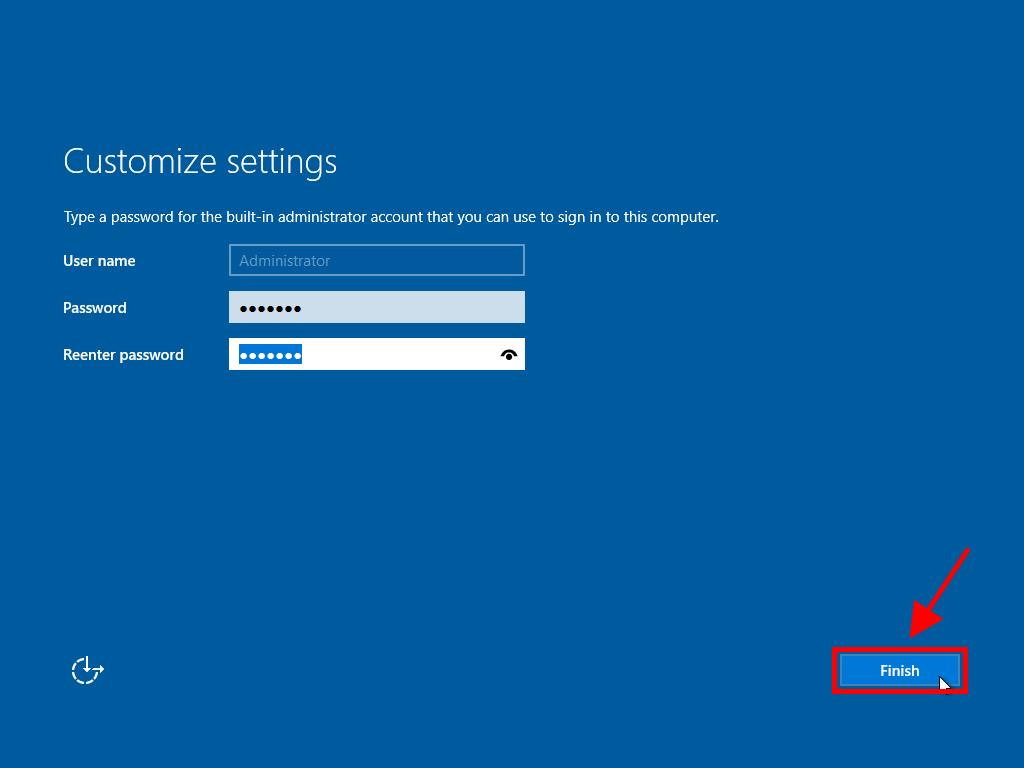
- Set a memorable password and select Finish.
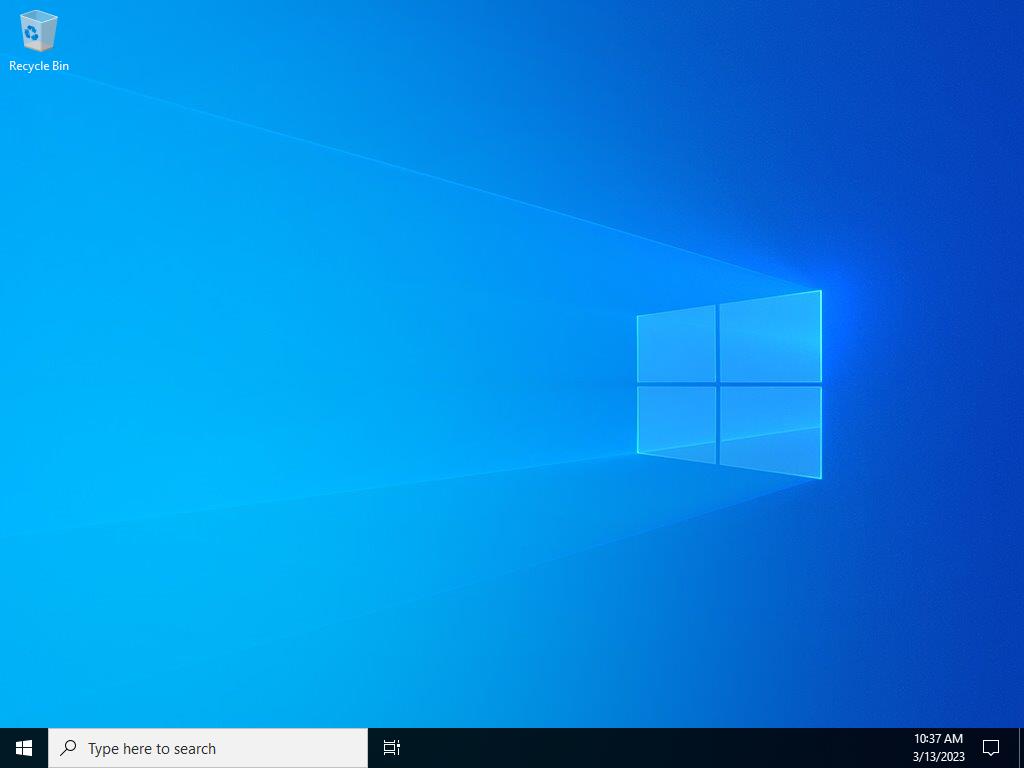
- Finally, press Ctrl+Alt+Del, enter your password, and access your new Windows Server desktop.
Note: If the Windows Server setup does not start after rebooting, modify your PC's BIOS settings to prioritize booting from USB.
Note: For optimal performance, we advise deleting all previous partitions on the hard drive. If the drive is new, simply proceed by clicking next.
 Sign In / Sign Up
 Orders
 Product Keys
 Downloads
