How to Create Windows 10 Installation Media
After downloading the Windows 10 .iso file, you can create a USB boot drive to install the operating system.
Note: You'll need a USB device with at least 8 GB of storage space.
You can use the following applications to create the installation media:
Rufus
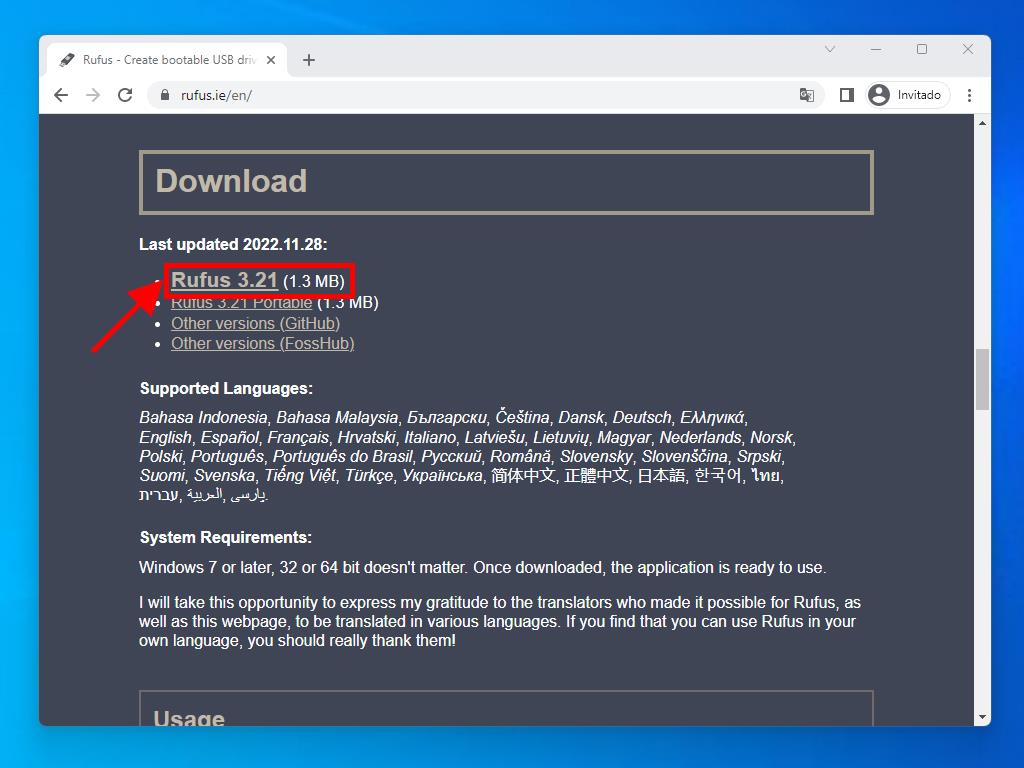
- Download Rufus for free here.
- Scroll down and download the latest version of Rufus from the Download section.
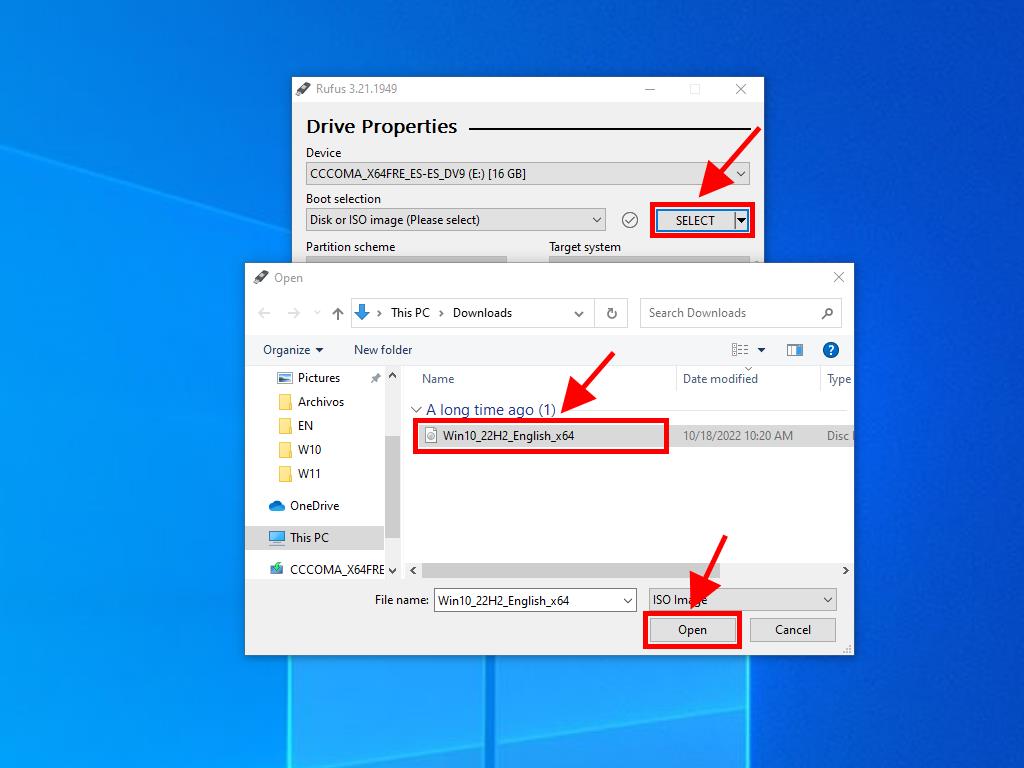
- Connect your USB drive and open the Rufus program.
- Click on Select and locate the Windows 10 .iso file you downloaded.
- Finally, click on Start.
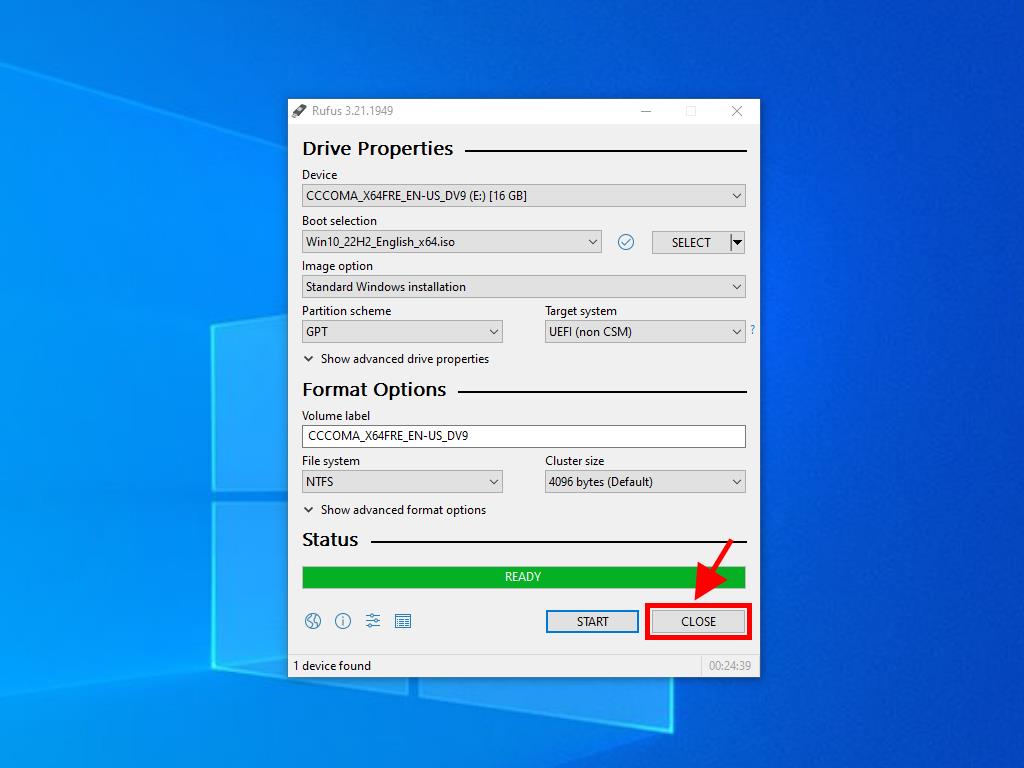
- Once the setup is complete (progress bar reaches 100%), click Close and your USB drive will be ready to install Windows 10.
Note: A popup window titled Customize Windows Installation will appear; select the Disable Data Collection option and wait for the program to create the bootable USB drive.
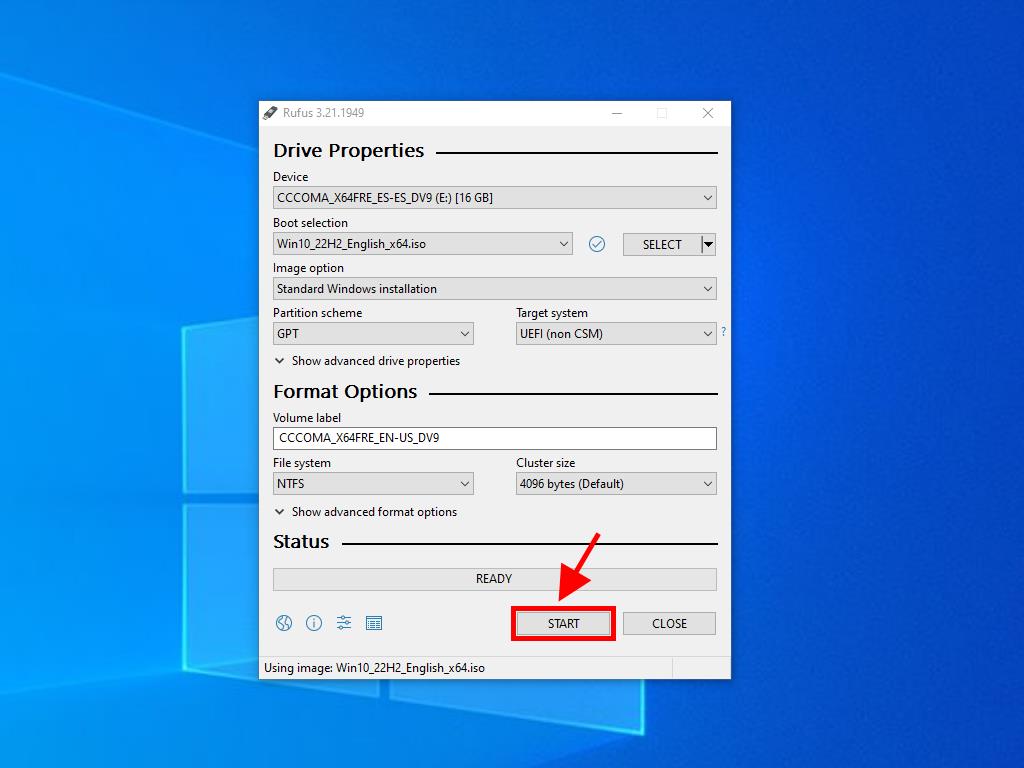
Note: For PCs released after 2020, select the GPT partition scheme option. For PCs released before 2020, select MBR.
MediaCreationTool
- Download MediaCreationTool for free here.
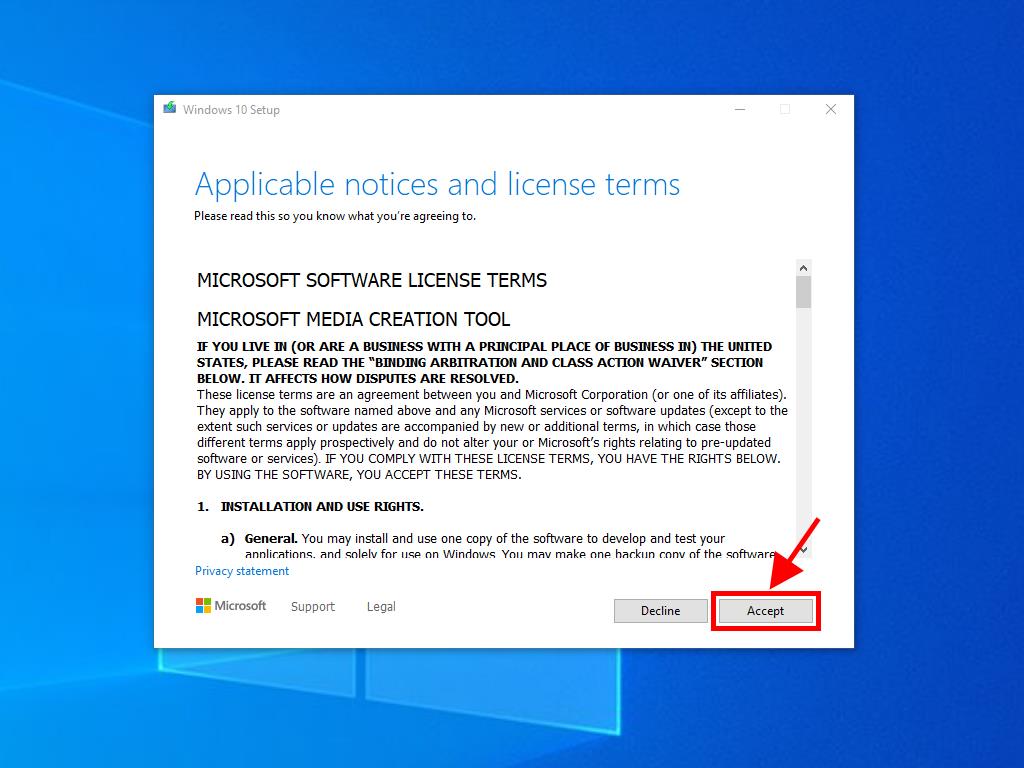
- Accept the terms and conditions to proceed with the installation.
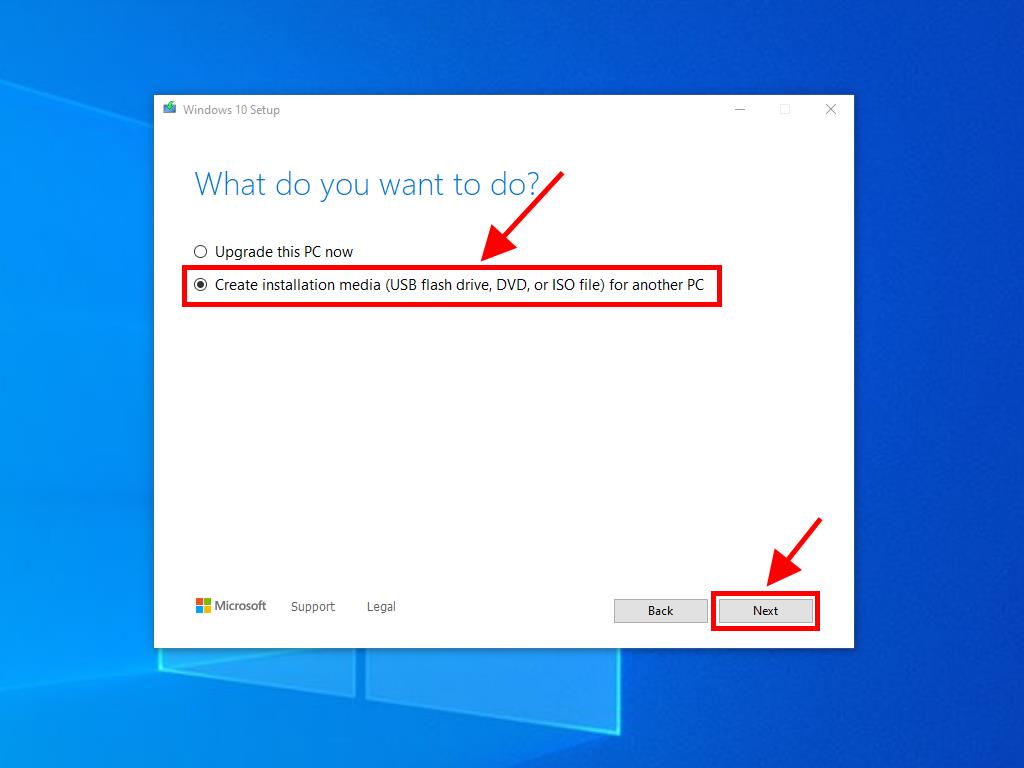
- After accepting the terms and conditions, select Create installation media and click Next.
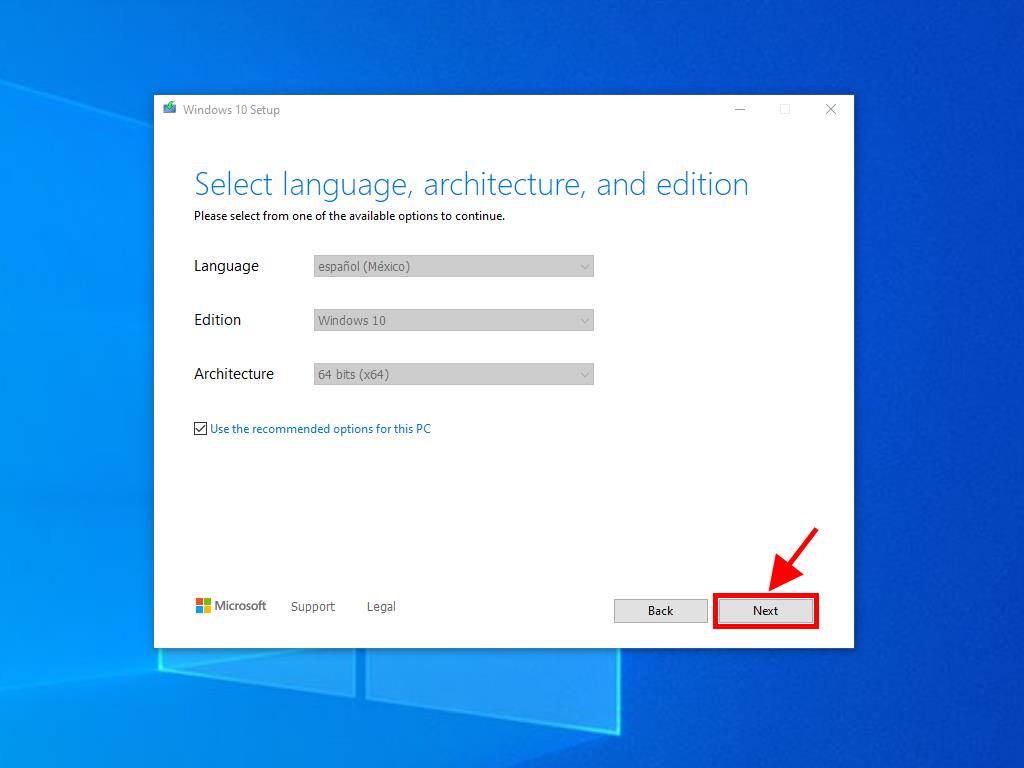
- Select the language, edition, and architecture for Windows 10.
- Click Next and select either USB flash drive or .iso file.
- Ensure your USB drive is connected and click Next to start the download and setup process on your USB drive.
Note: If the default language or edition doesn't match your preferences, uncheck the Use the recommended options for this PC box to choose your desired settings.
Notes: If your USB drive isn't recognized, restart the application without disconnecting the USB drive. Back up all data on the USB drive, as it will be erased during the process.
 Sign In / Sign Up
 Orders
 Product Keys
 Downloads
