Sign In / Sign Up
 Orders
 Product Keys
 Downloads

How to Install Windows 8
Once you have created a USB boot disk, follow these instructions for a fresh installation:
- Start your PC normally, insert the Windows 8 DVD or USB, then restart your PC.
- Your device will boot from the Windows 8 USB or DVD. Press any key when you see the message Press any key to boot from CD or DVD.
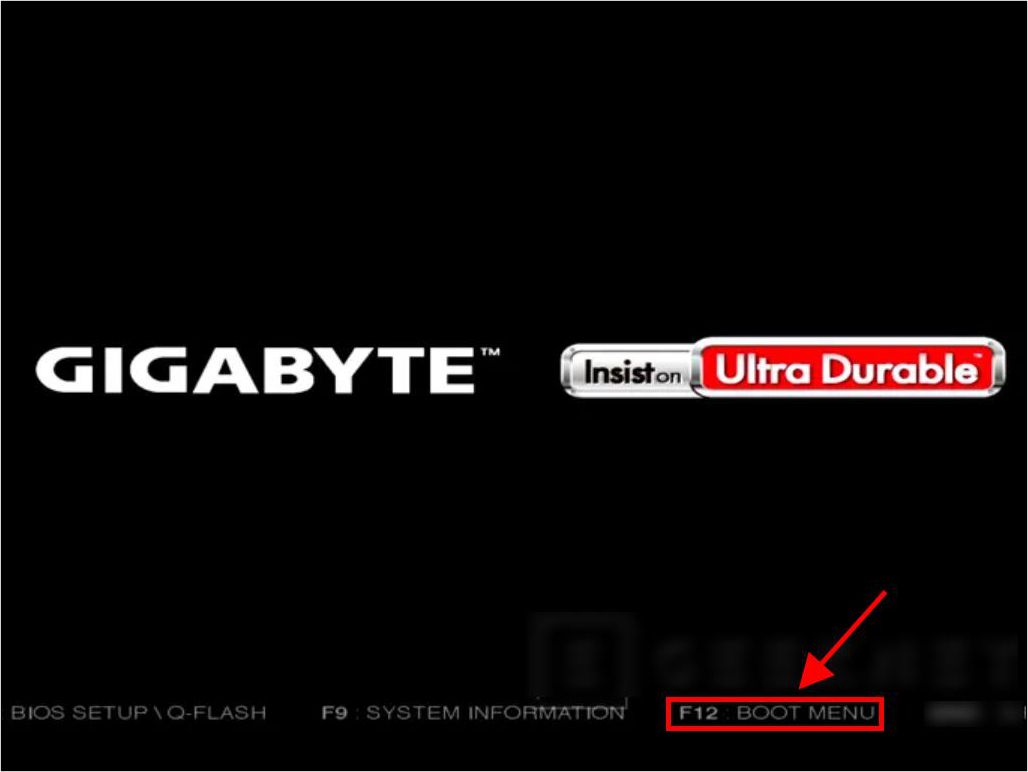
- Restart your PC, and when the manufacturer's logo appears, press the BOOT menu key (usually F2, F10, F11, F12, or Del) to open the menu.
- Change the boot order to USB.
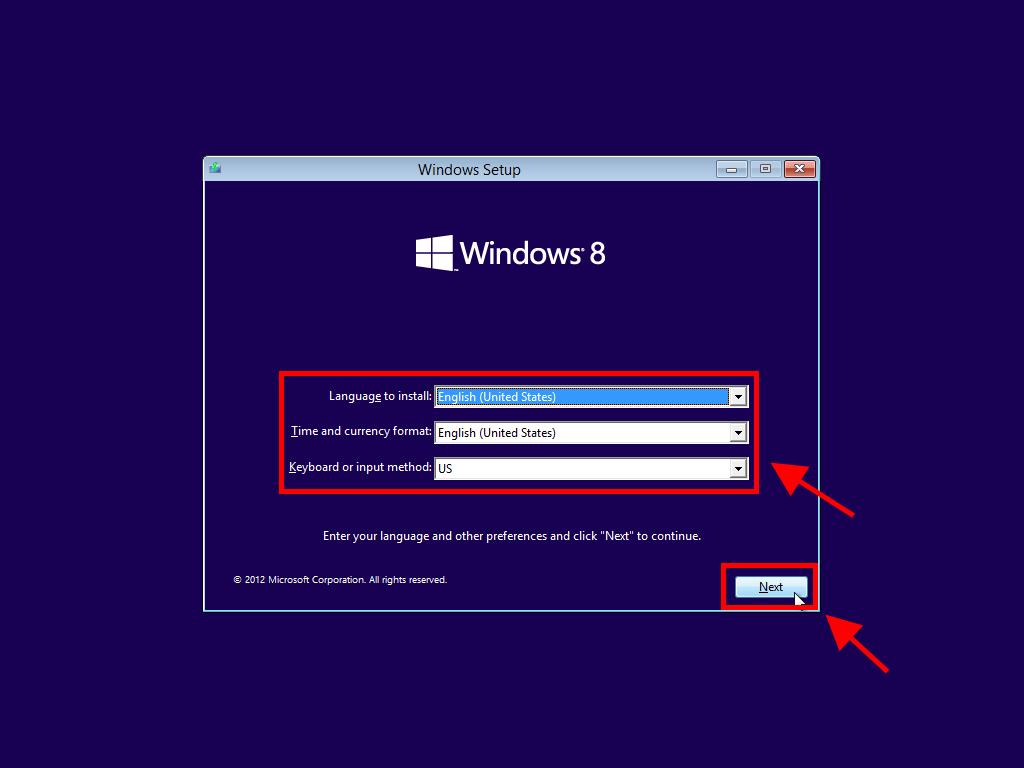
- When the setup program starts, select your language, time format, currency, and input method, then click Next.
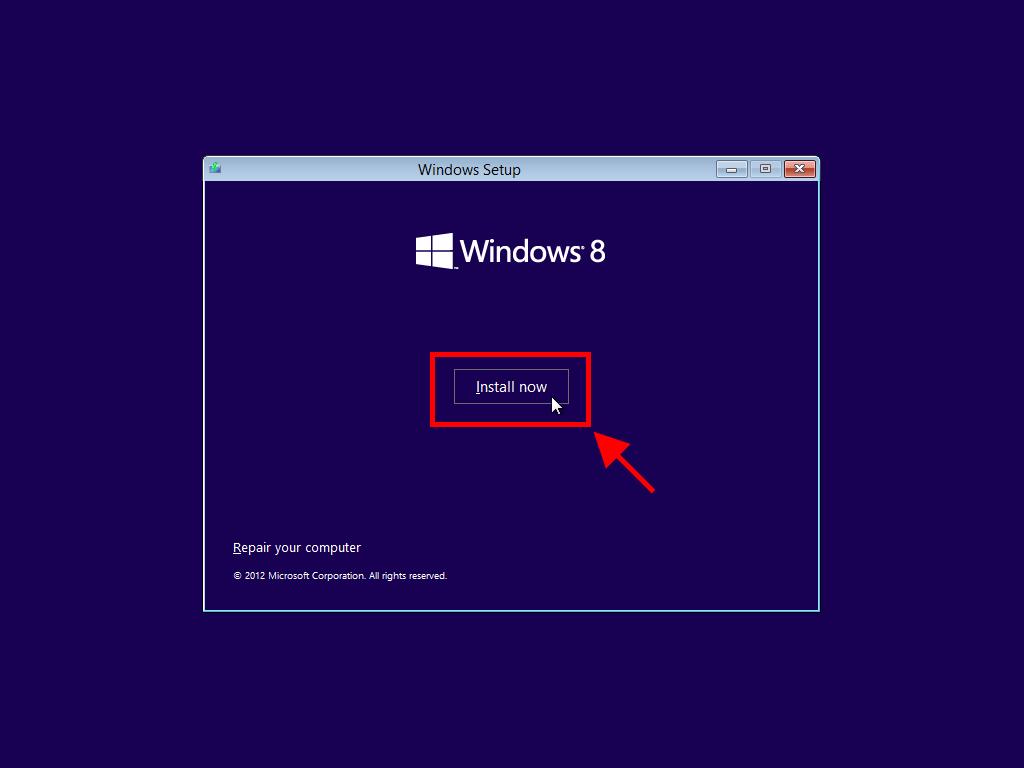
- Click Install now to begin the installation.
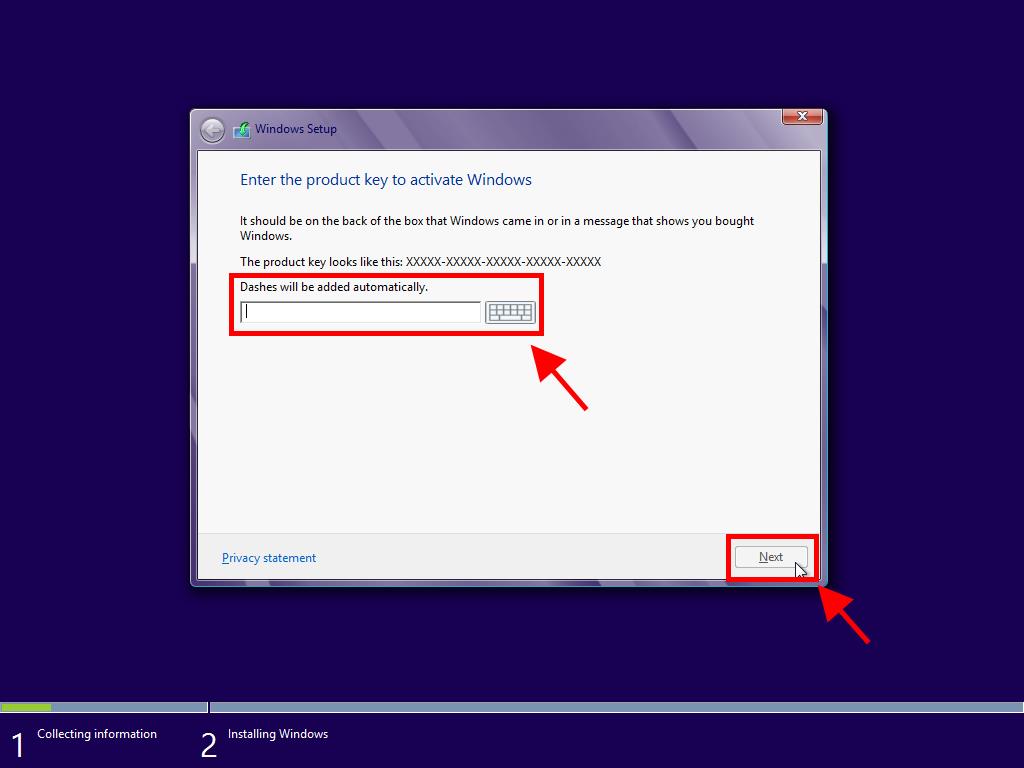
- Enter your product key to activate Windows 8 and click Next.
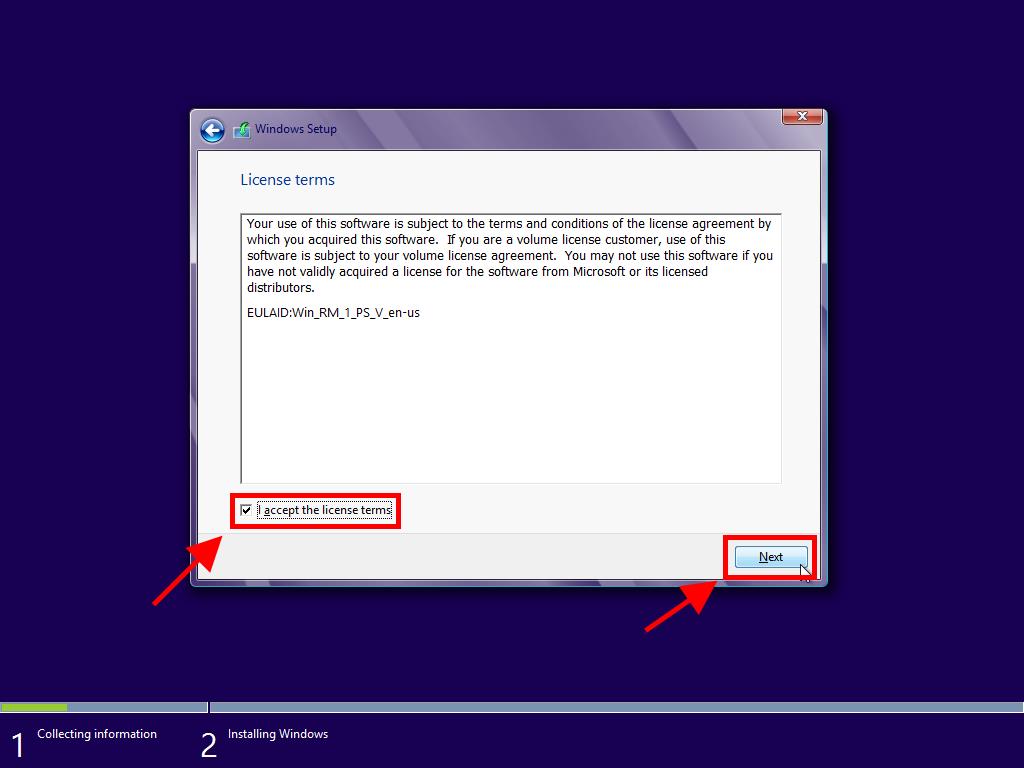
- Accept the license terms and click Next.
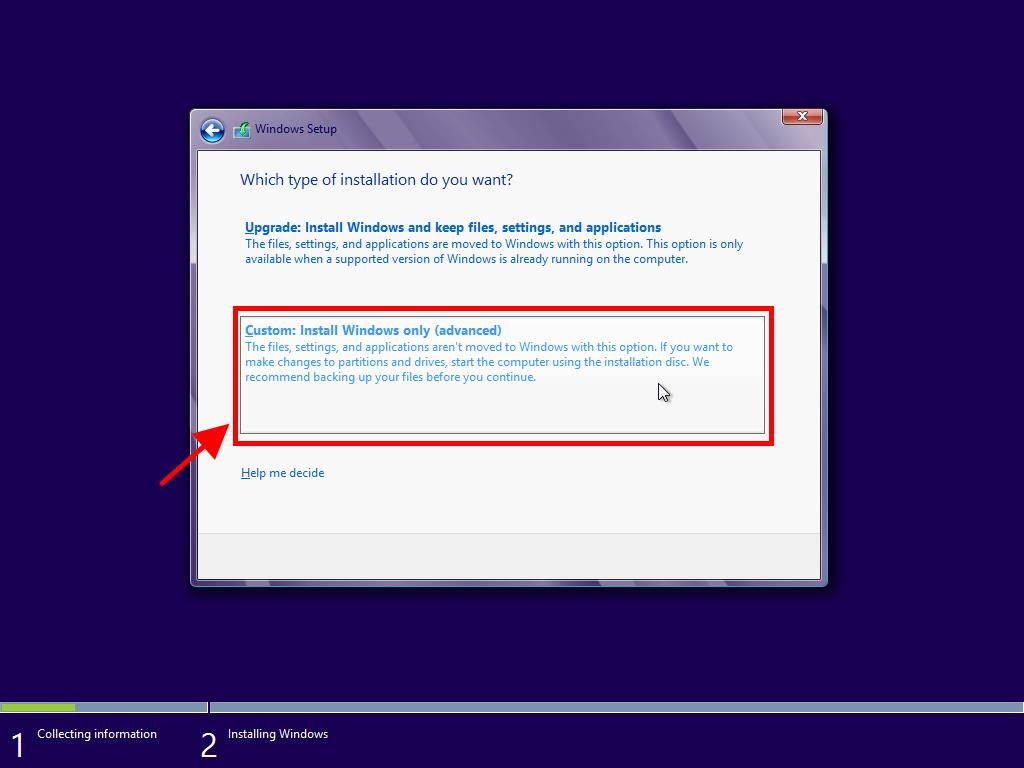
- Choose Custom: Install Windows only (advanced) on the next screen.
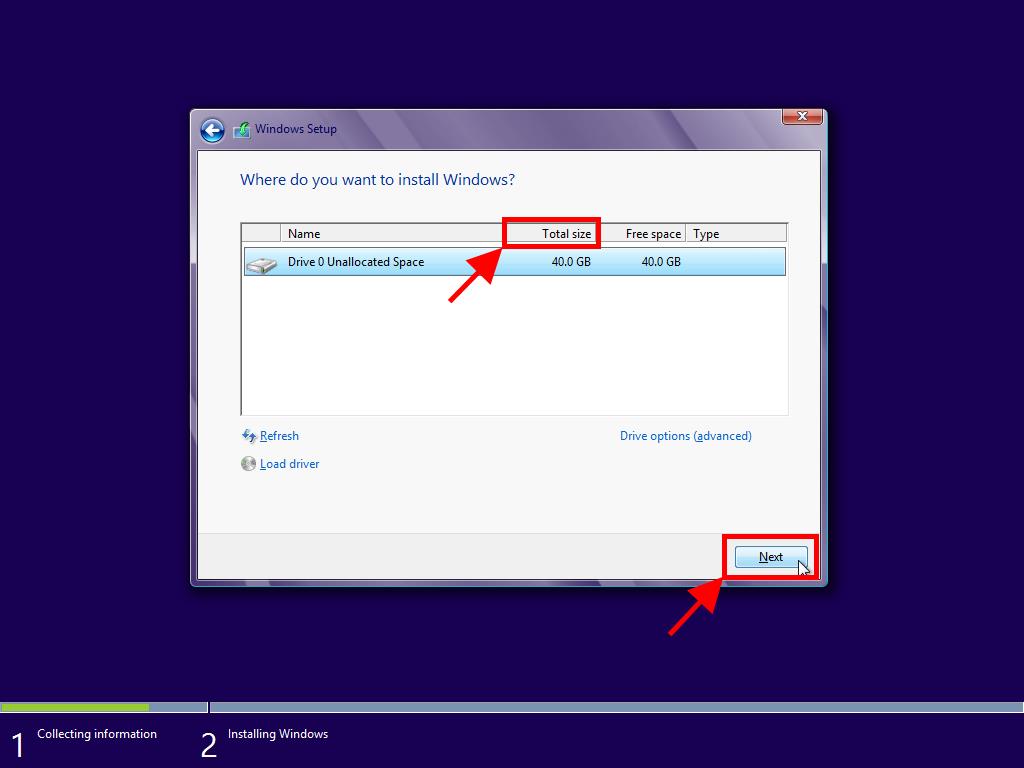
- Select the disk drive where you want to install Windows 8 and click Next.
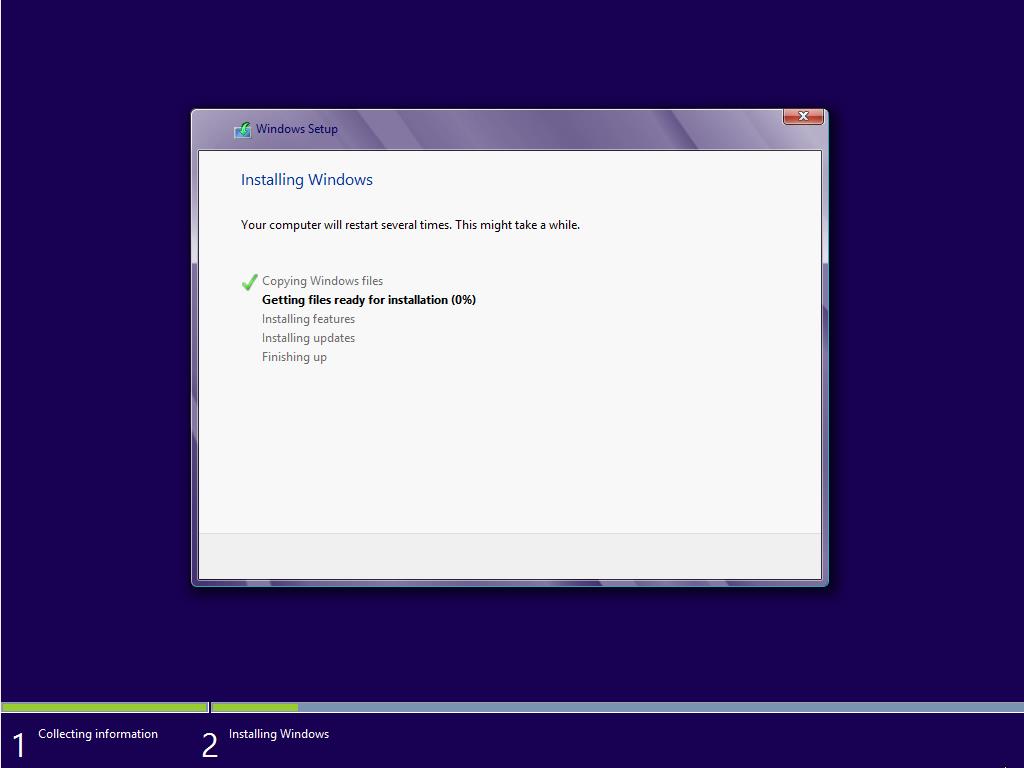
- Windows will start installing on your PC.
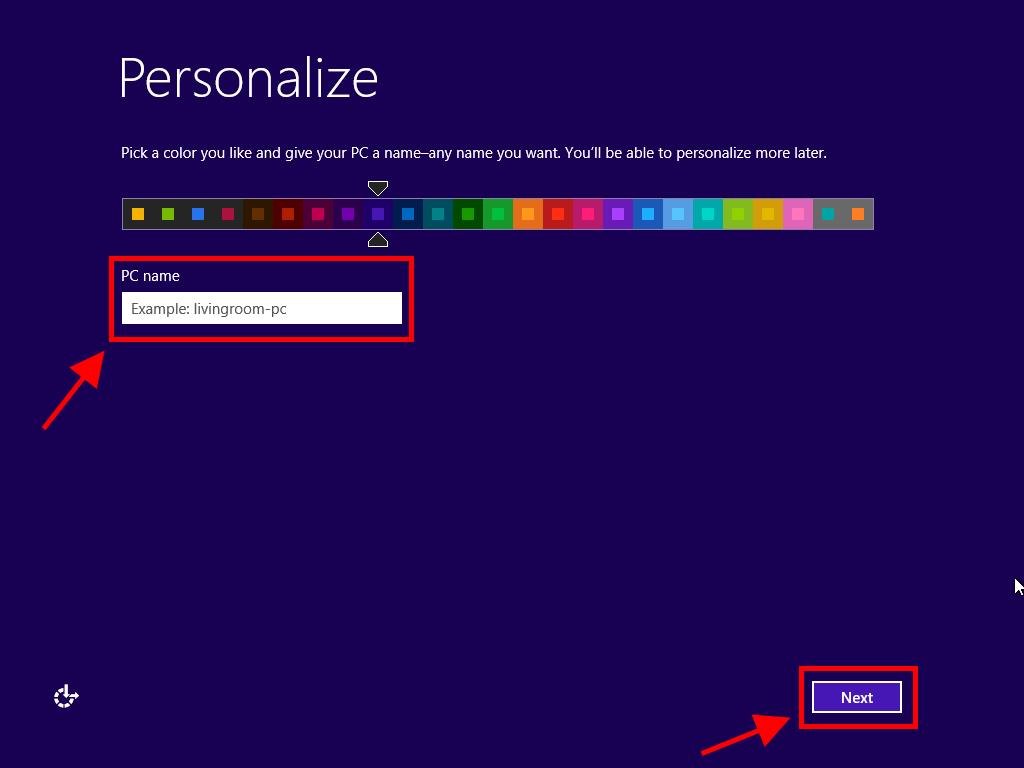
- After several restarts, personalize your PC by choosing the color you want Windows to appear in and name your PC. Click Next.
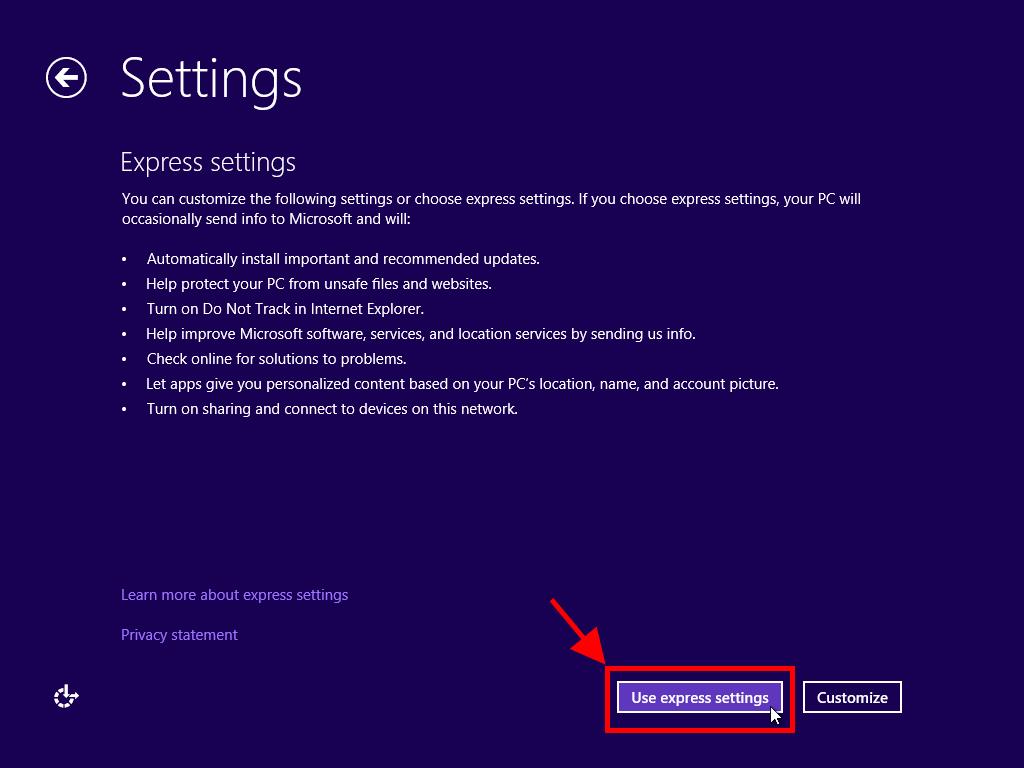
- Select Use Express settings.
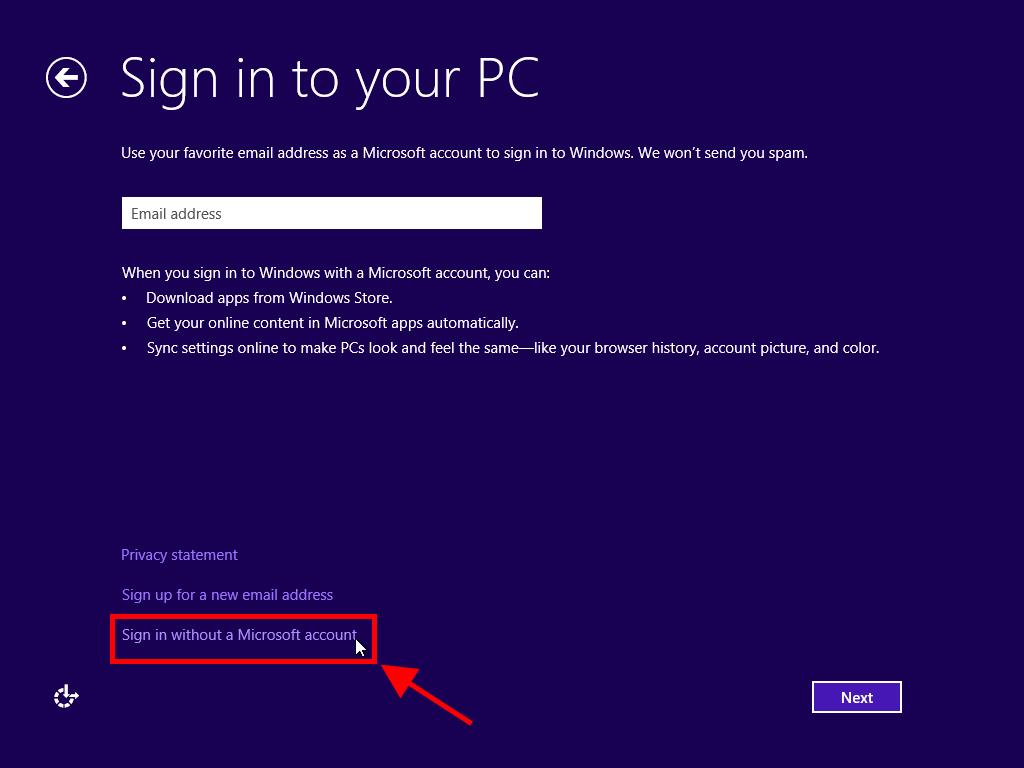
- Sign in with your Microsoft account by entering your email and password, then click Next, or choose to sign in without a Microsoft account.
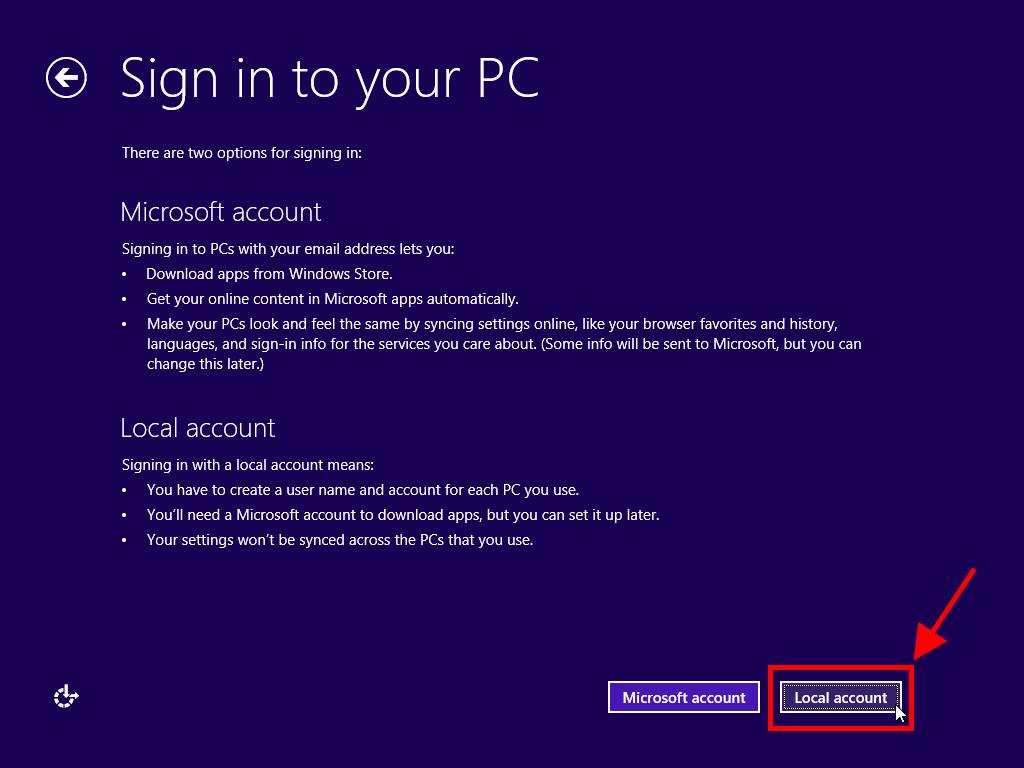
- Click Local account.
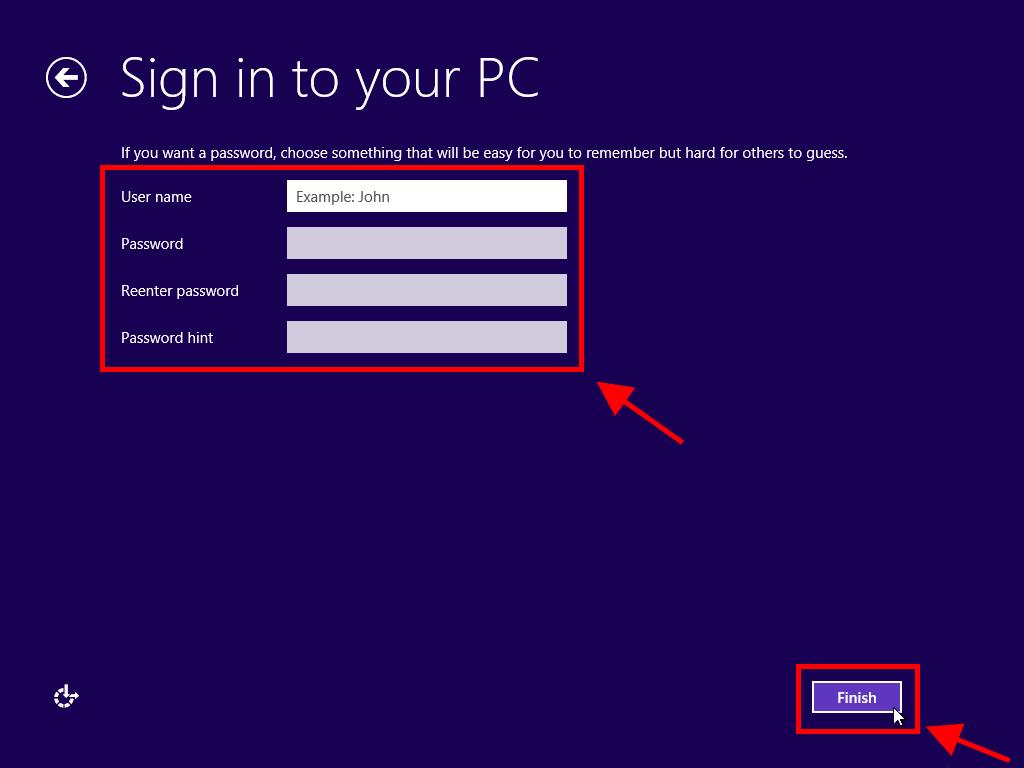
- Enter a username and login password in the next box, then click Finish.
- Wait a few minutes for the configuration to complete, and Windows 8 will be fully installed.

Note: If your current version of Windows starts when you restart your PC, you need to change the boot order in your BIOS settings to boot from the DVD.
Note: To identify the right hard drive, look at the Total size column and select the one with the most space in GB.
Note: The next steps cover Sign in without a Microsoft account.